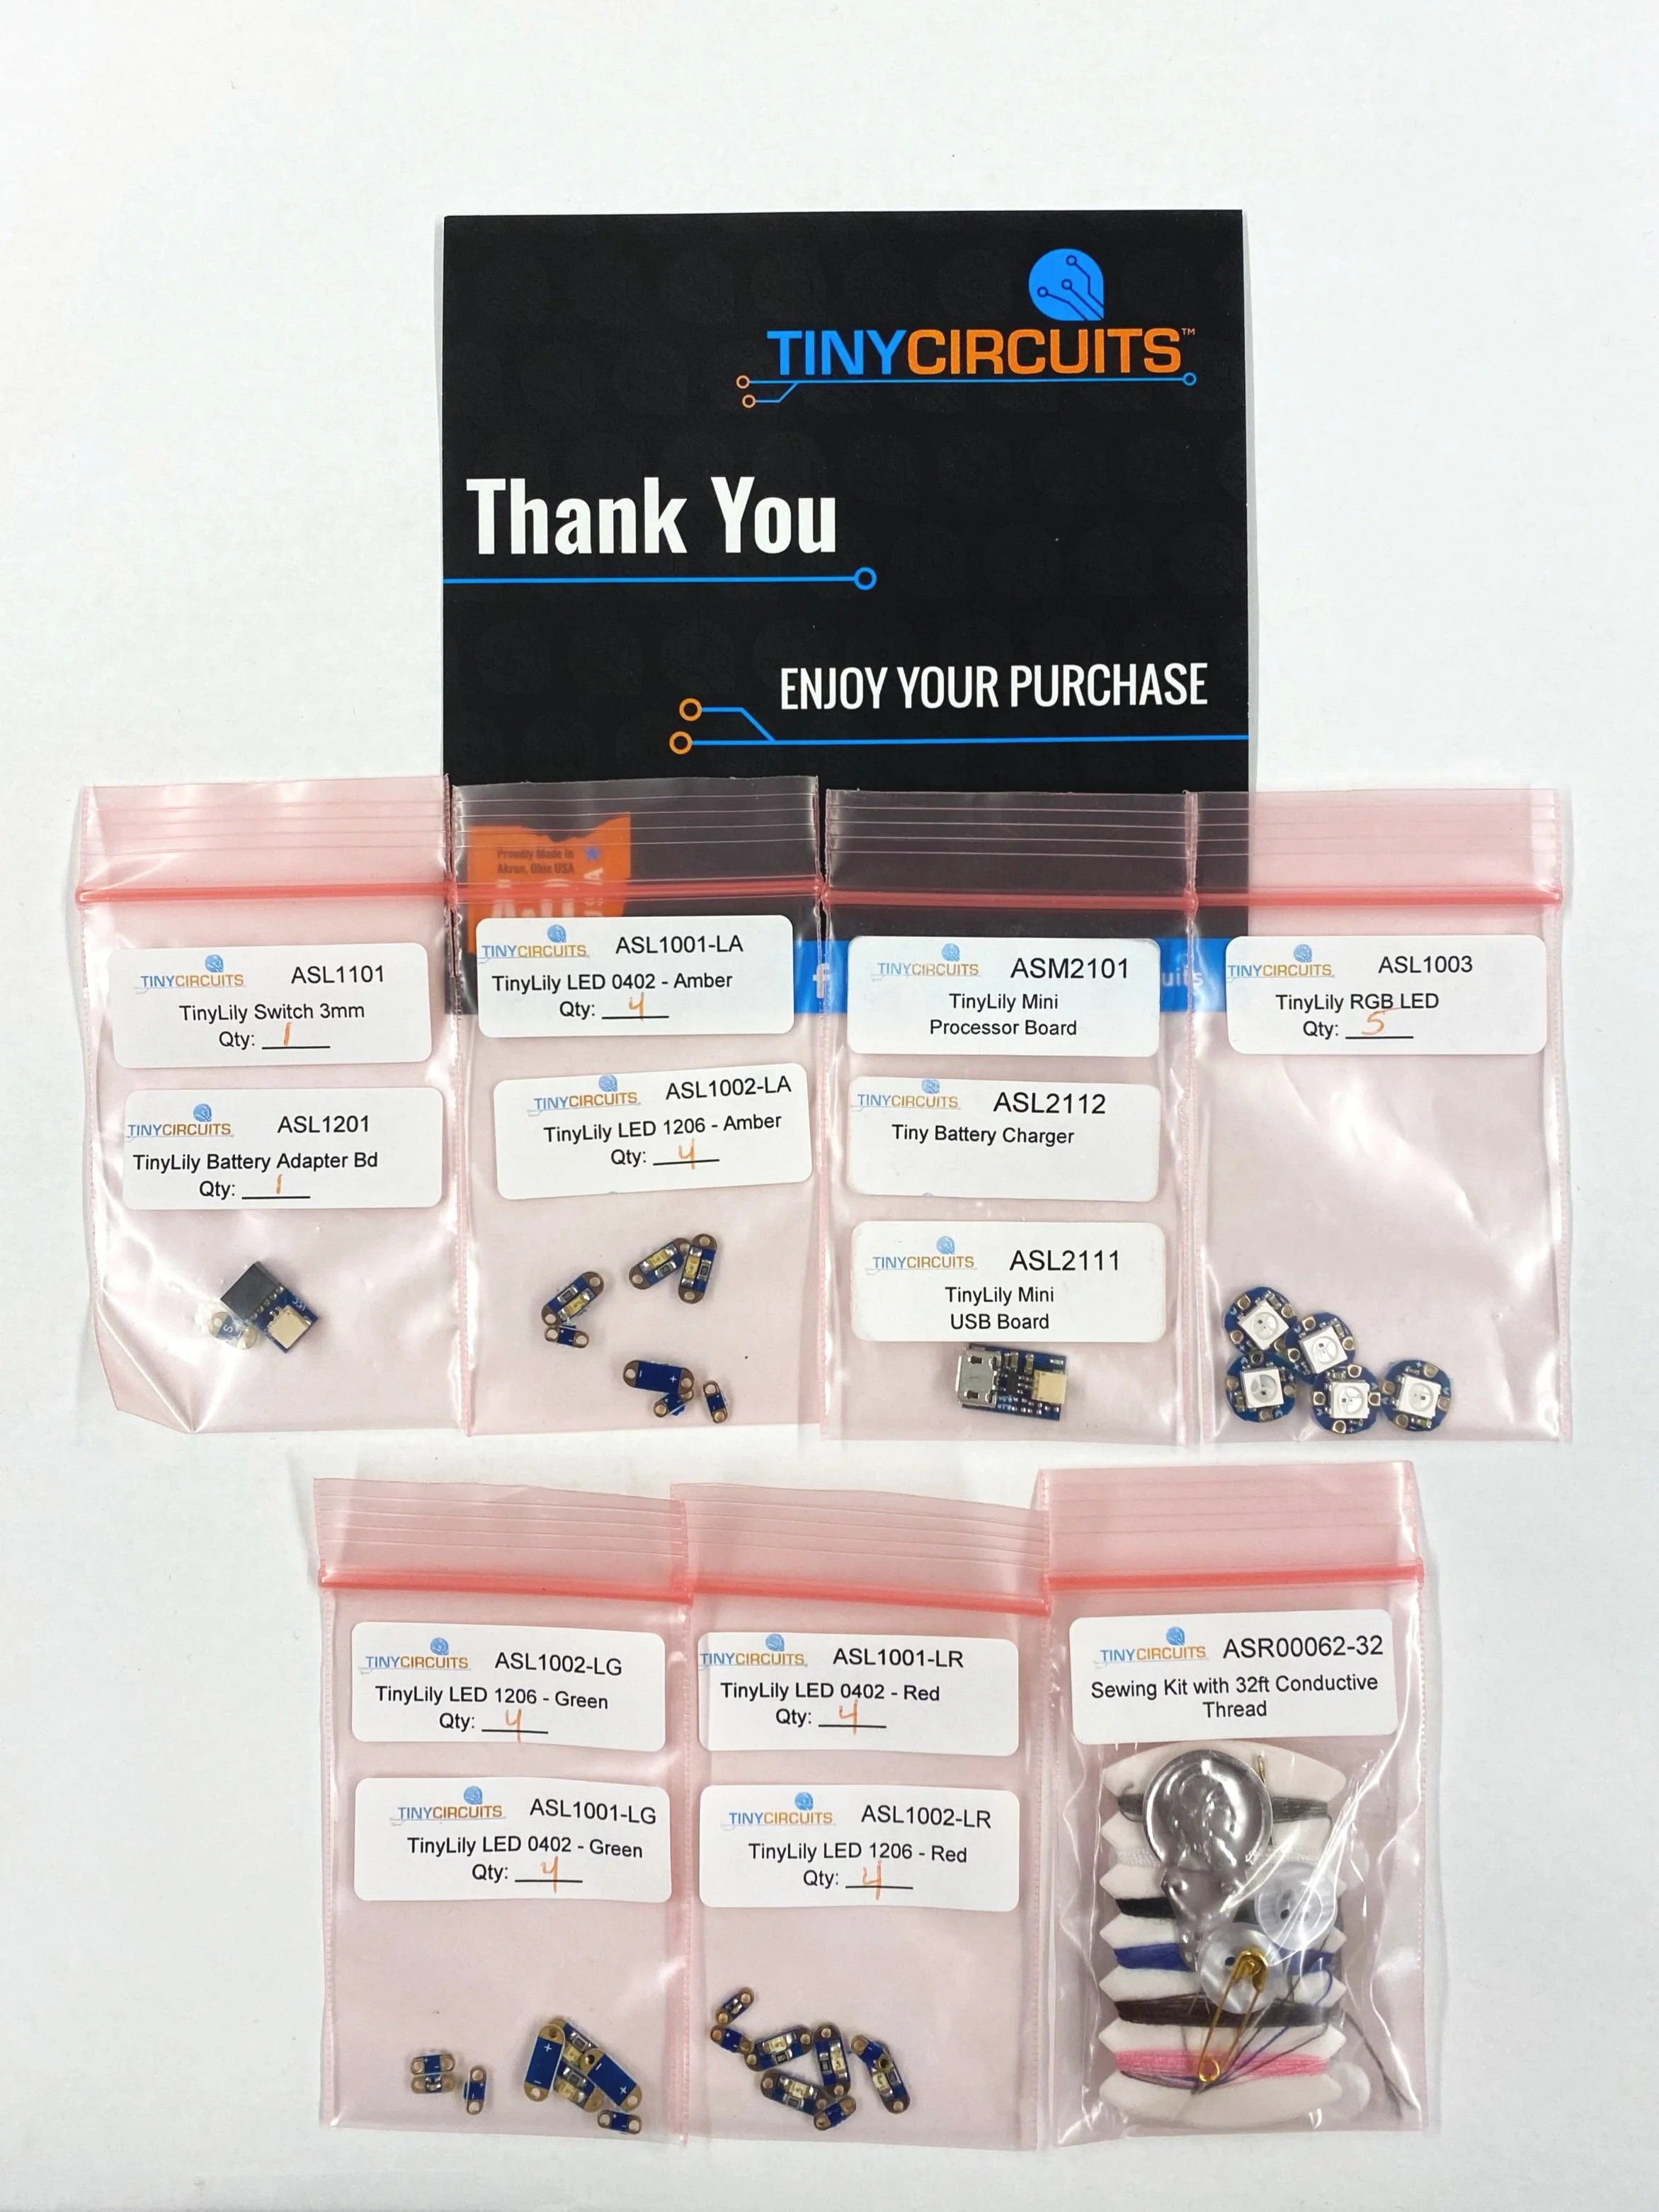
Tools and Materials
36 Gauge Conductive Wire
Embroidery Hoop 6- inch
TinyLily starter Kit, incl. Mini Processor Board, USB Board, RGB LED, Battery Adaptor, Battery, needle, micro-USB cable
Temporary tattoo paper pack
PVA roll, Sulky (embroidery stabilizer)
Scissors
Sandpaper
Sponge or Tissues
Multimeter (How to use)


Construction Steps
Fabrication
It may be helpful to follow this video tutorial of the entire process:
1. Construct the “SkinCloth” skin overlay substrate (this is described in Fig 2. In the SkinWire paper). Set to dry.
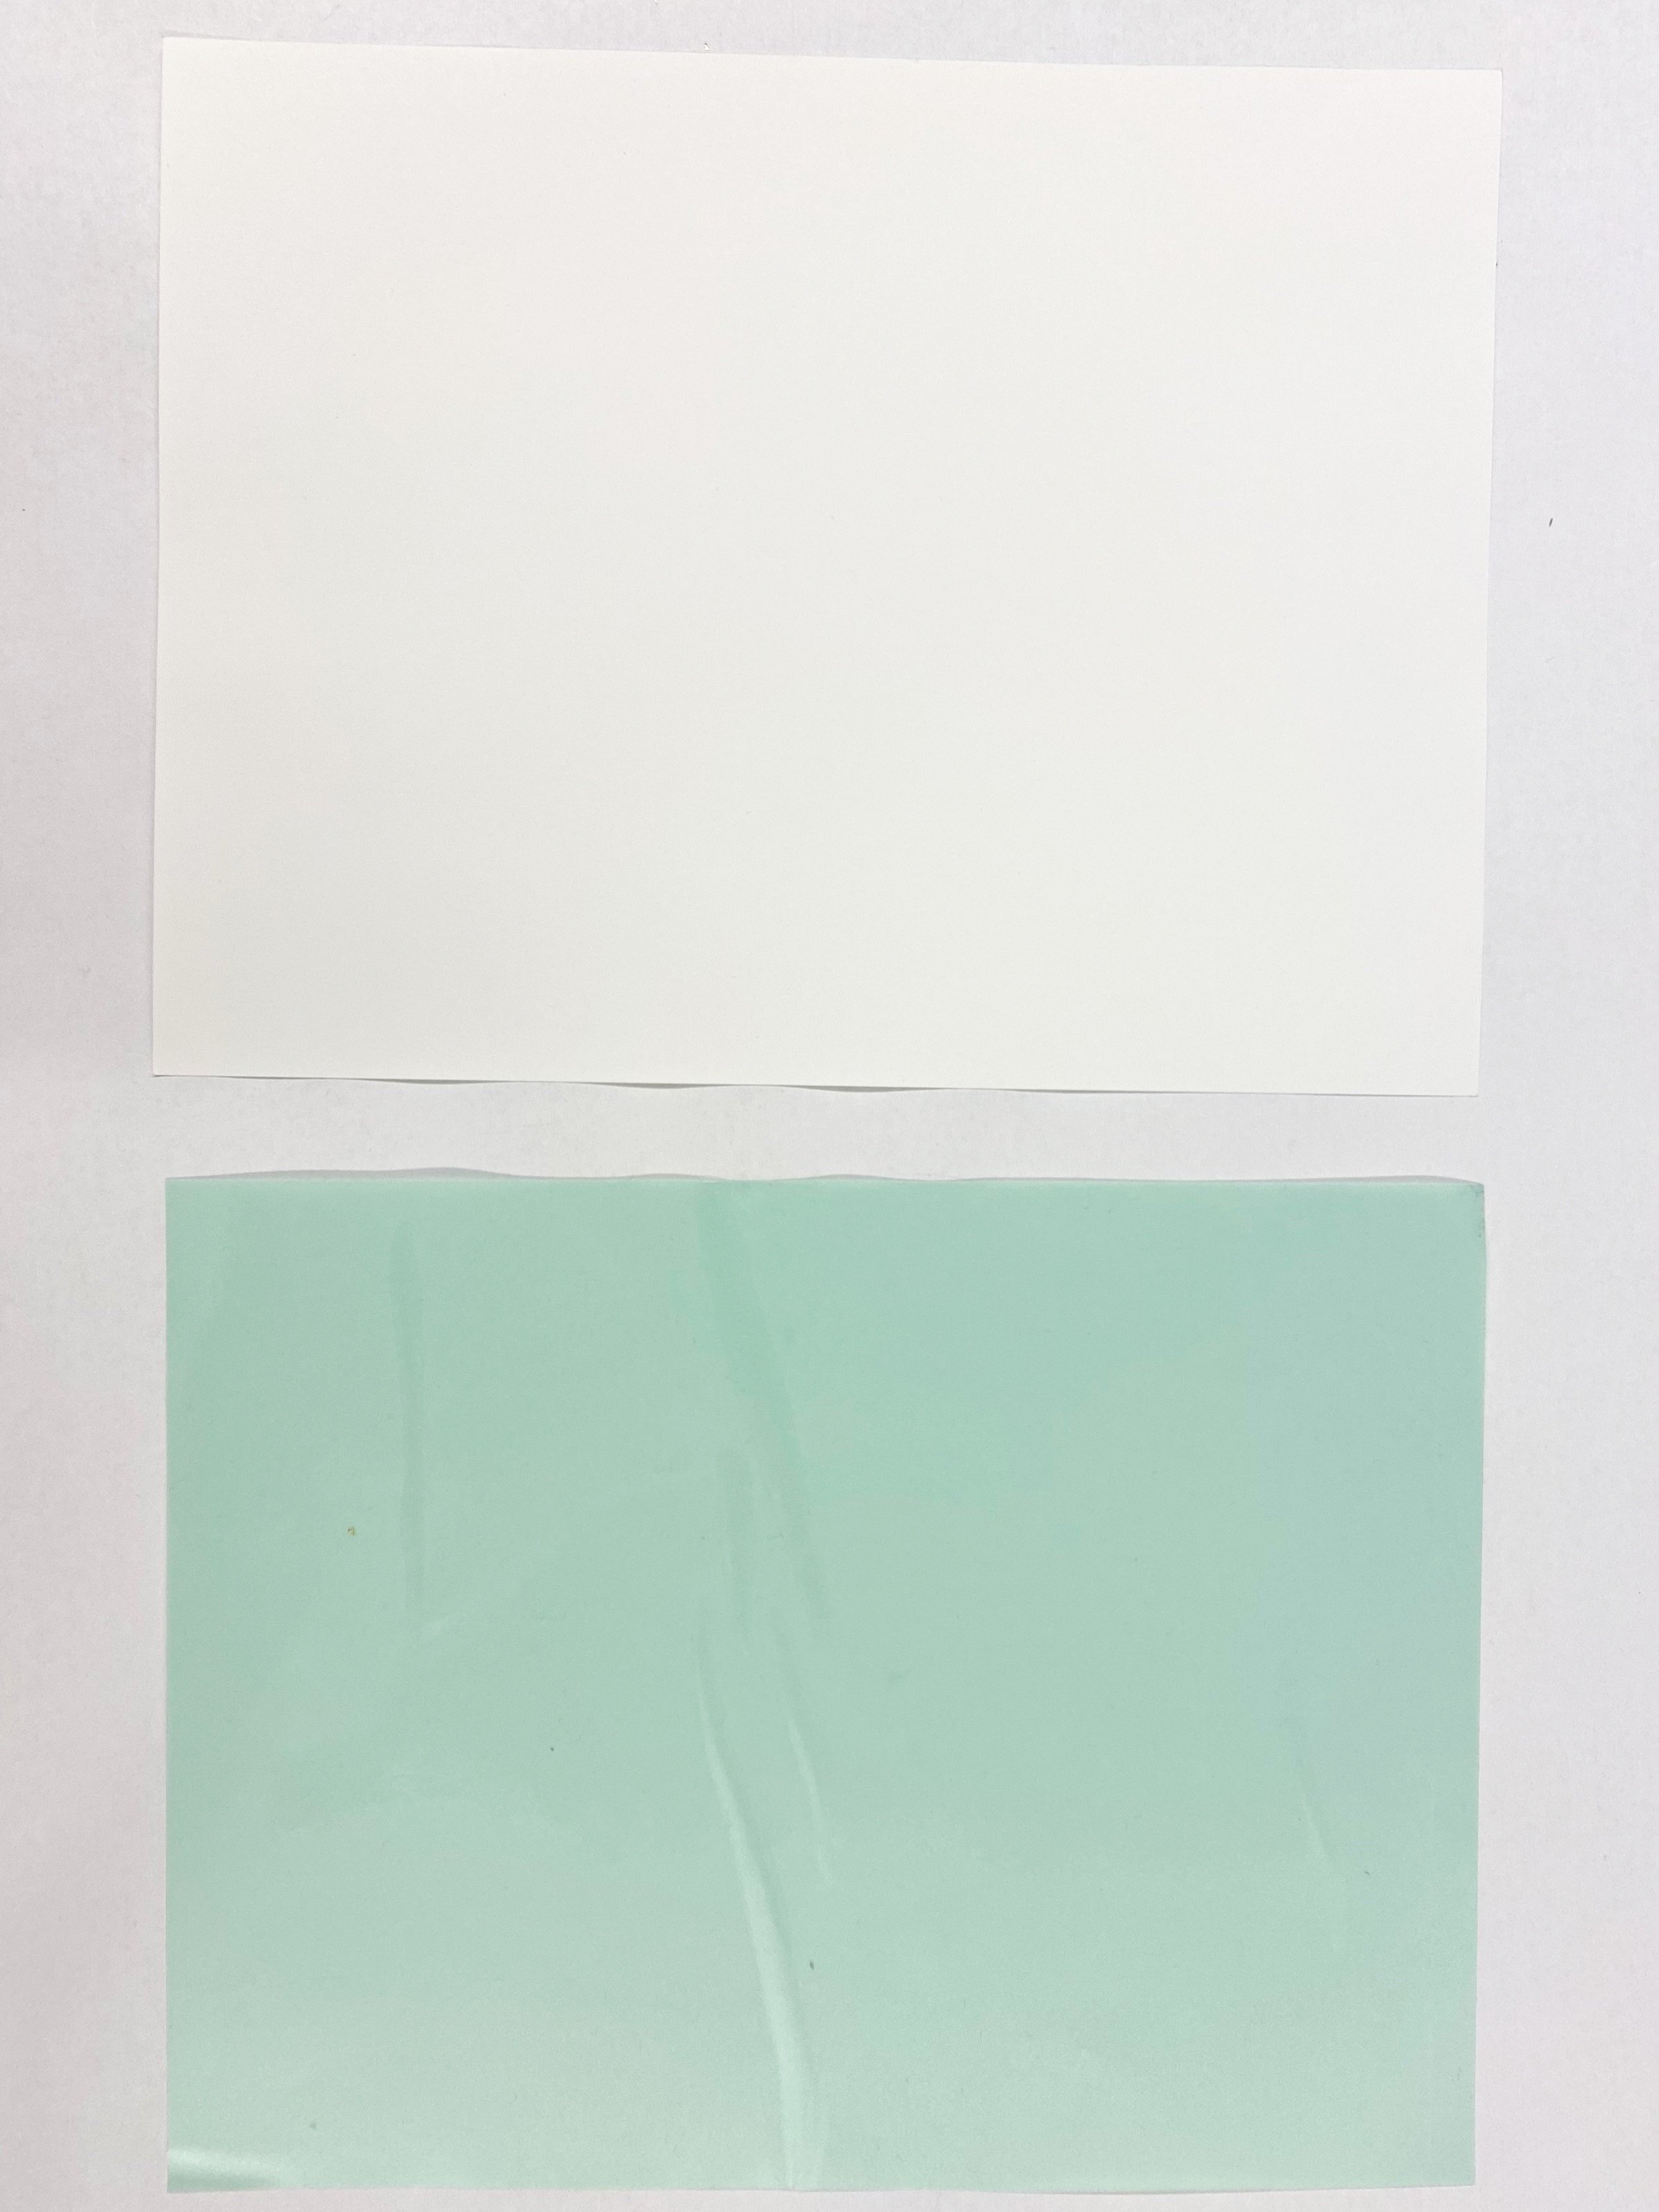
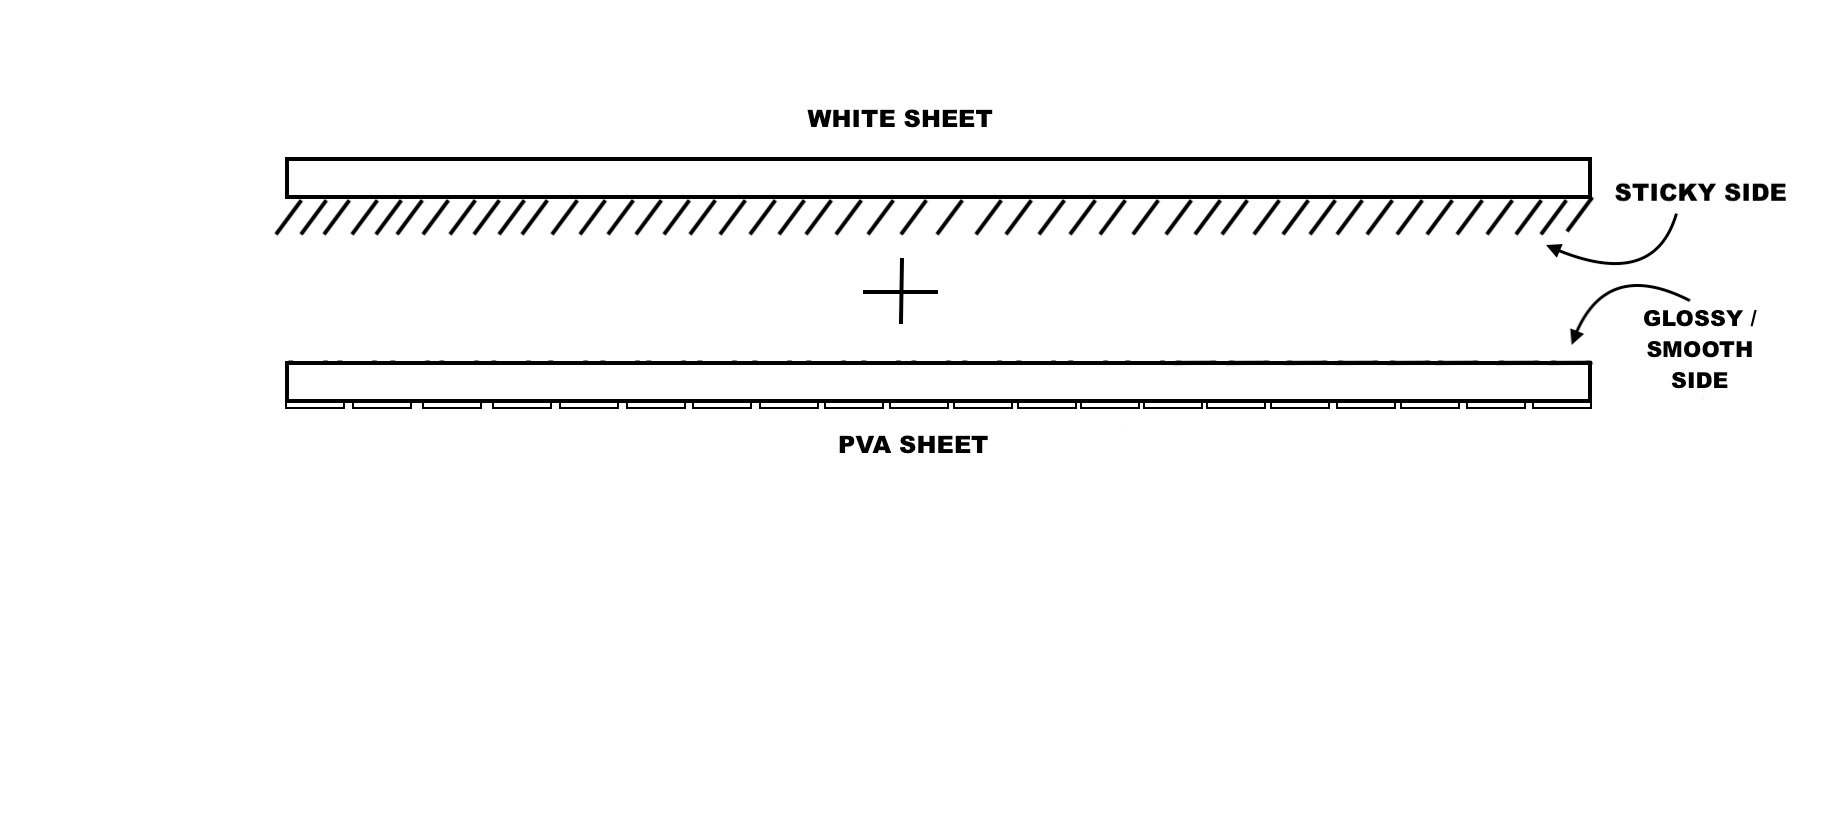
The three types of layer you will be using:
a. Green sheet: temp tattoo adhesive (packed together with the white sheet)
b. White sheet: temp tattoo silicone
c. Transparent sheet: PVA (Sulky, embroidery stabilizer)
The image bellow illustrates the three layers of SkinCloth
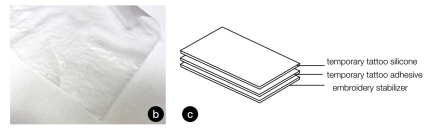
Three Layers of SkinCloth


2. Apply adhesive sheet on temp tattoo sheet
3. Remove the green backing from the adhesive layer
4. Stick that on temp tattoo sheet on the smooth and glossy silicon side of the white sheet.
5. Remove bubbles
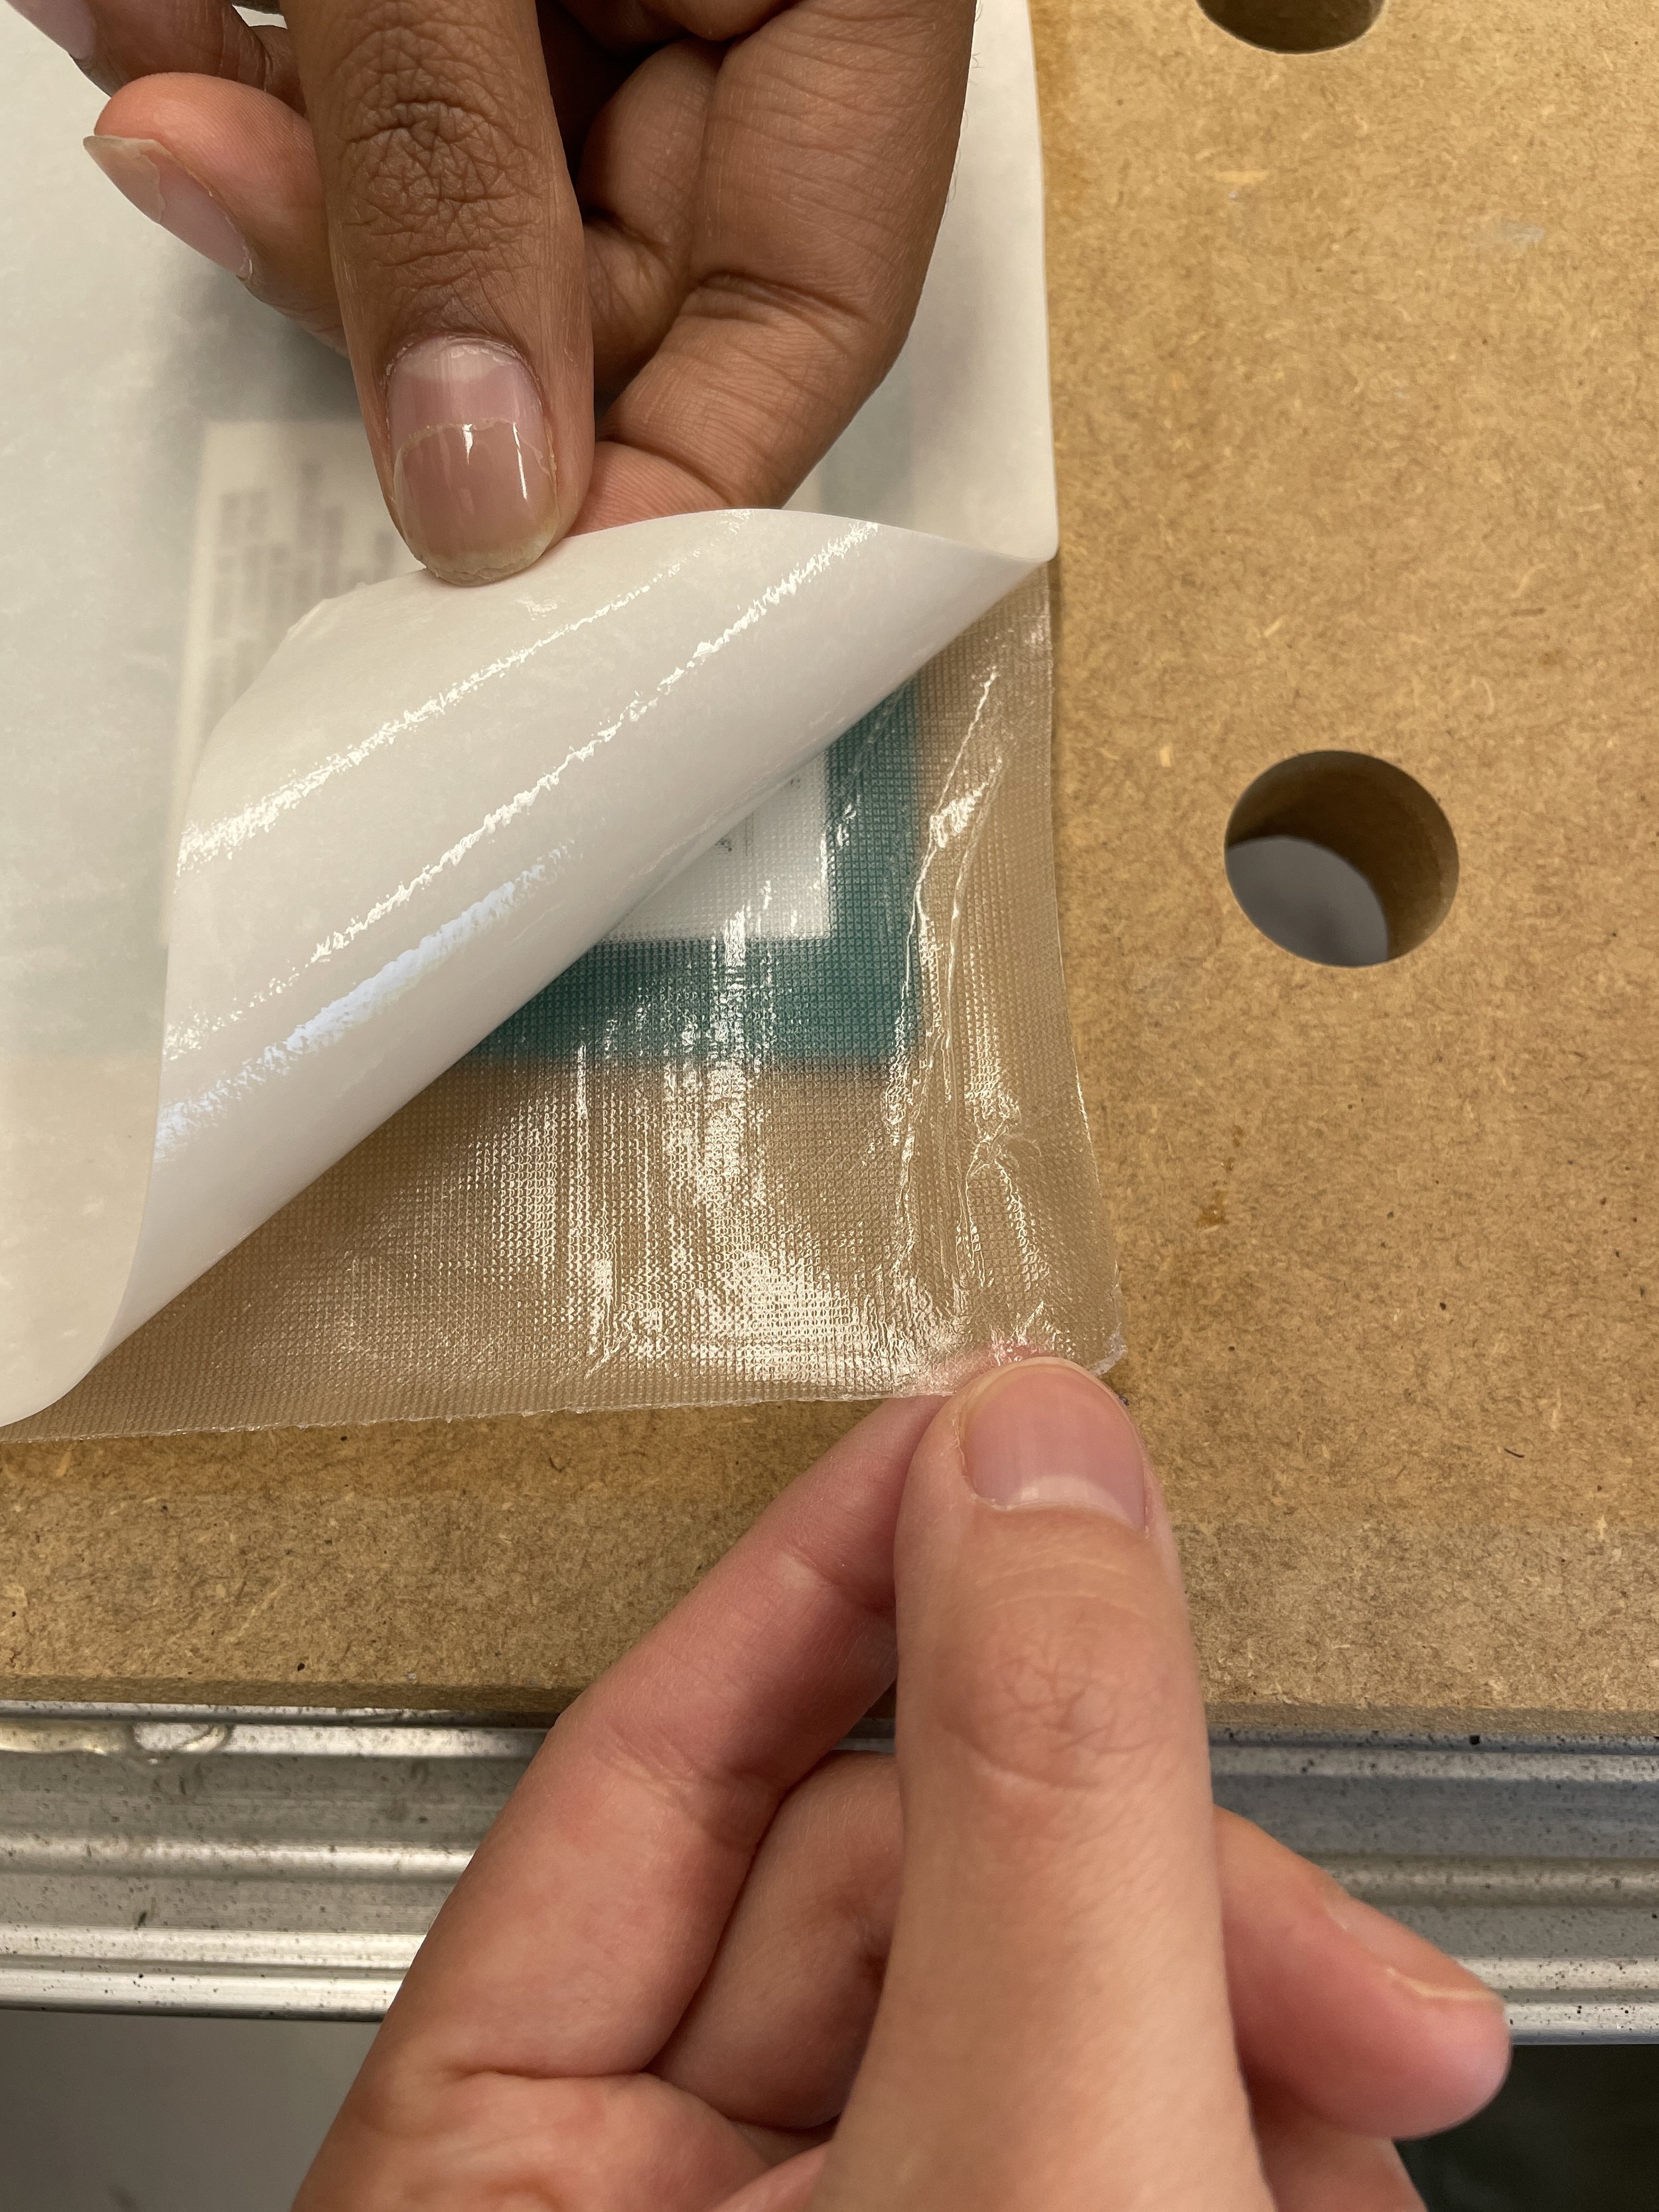
6. Cut a piece of the PVA roll to fit the tattoo sheet. You can feel the PVA and observe that is has a smooth side and a rougher side. Set aside for now.
7. Remove the clear cover of adhesive paper. After you remove the adhesive, one side of will be papery, while the other is sticky.
8. Stick the glossy (smooth) side of PVA onto the sticky side of the white sheet. So now one side is matte PVA and one side is paper.
It is recommended to put the PVA on the table first with the glossy side up, then gently place the white sheet with the sticky side facing down.
9. Remove paper part of temporary tattoo sheet by applying water
Soak the paper side with a wet paper towel/tissue or sponge (make sure not to apply TOO MUCH water!). The left picture below looks about right.
You can also tap it with your finger. Peel off the paper layer slowly and carefully. See the picture below right.
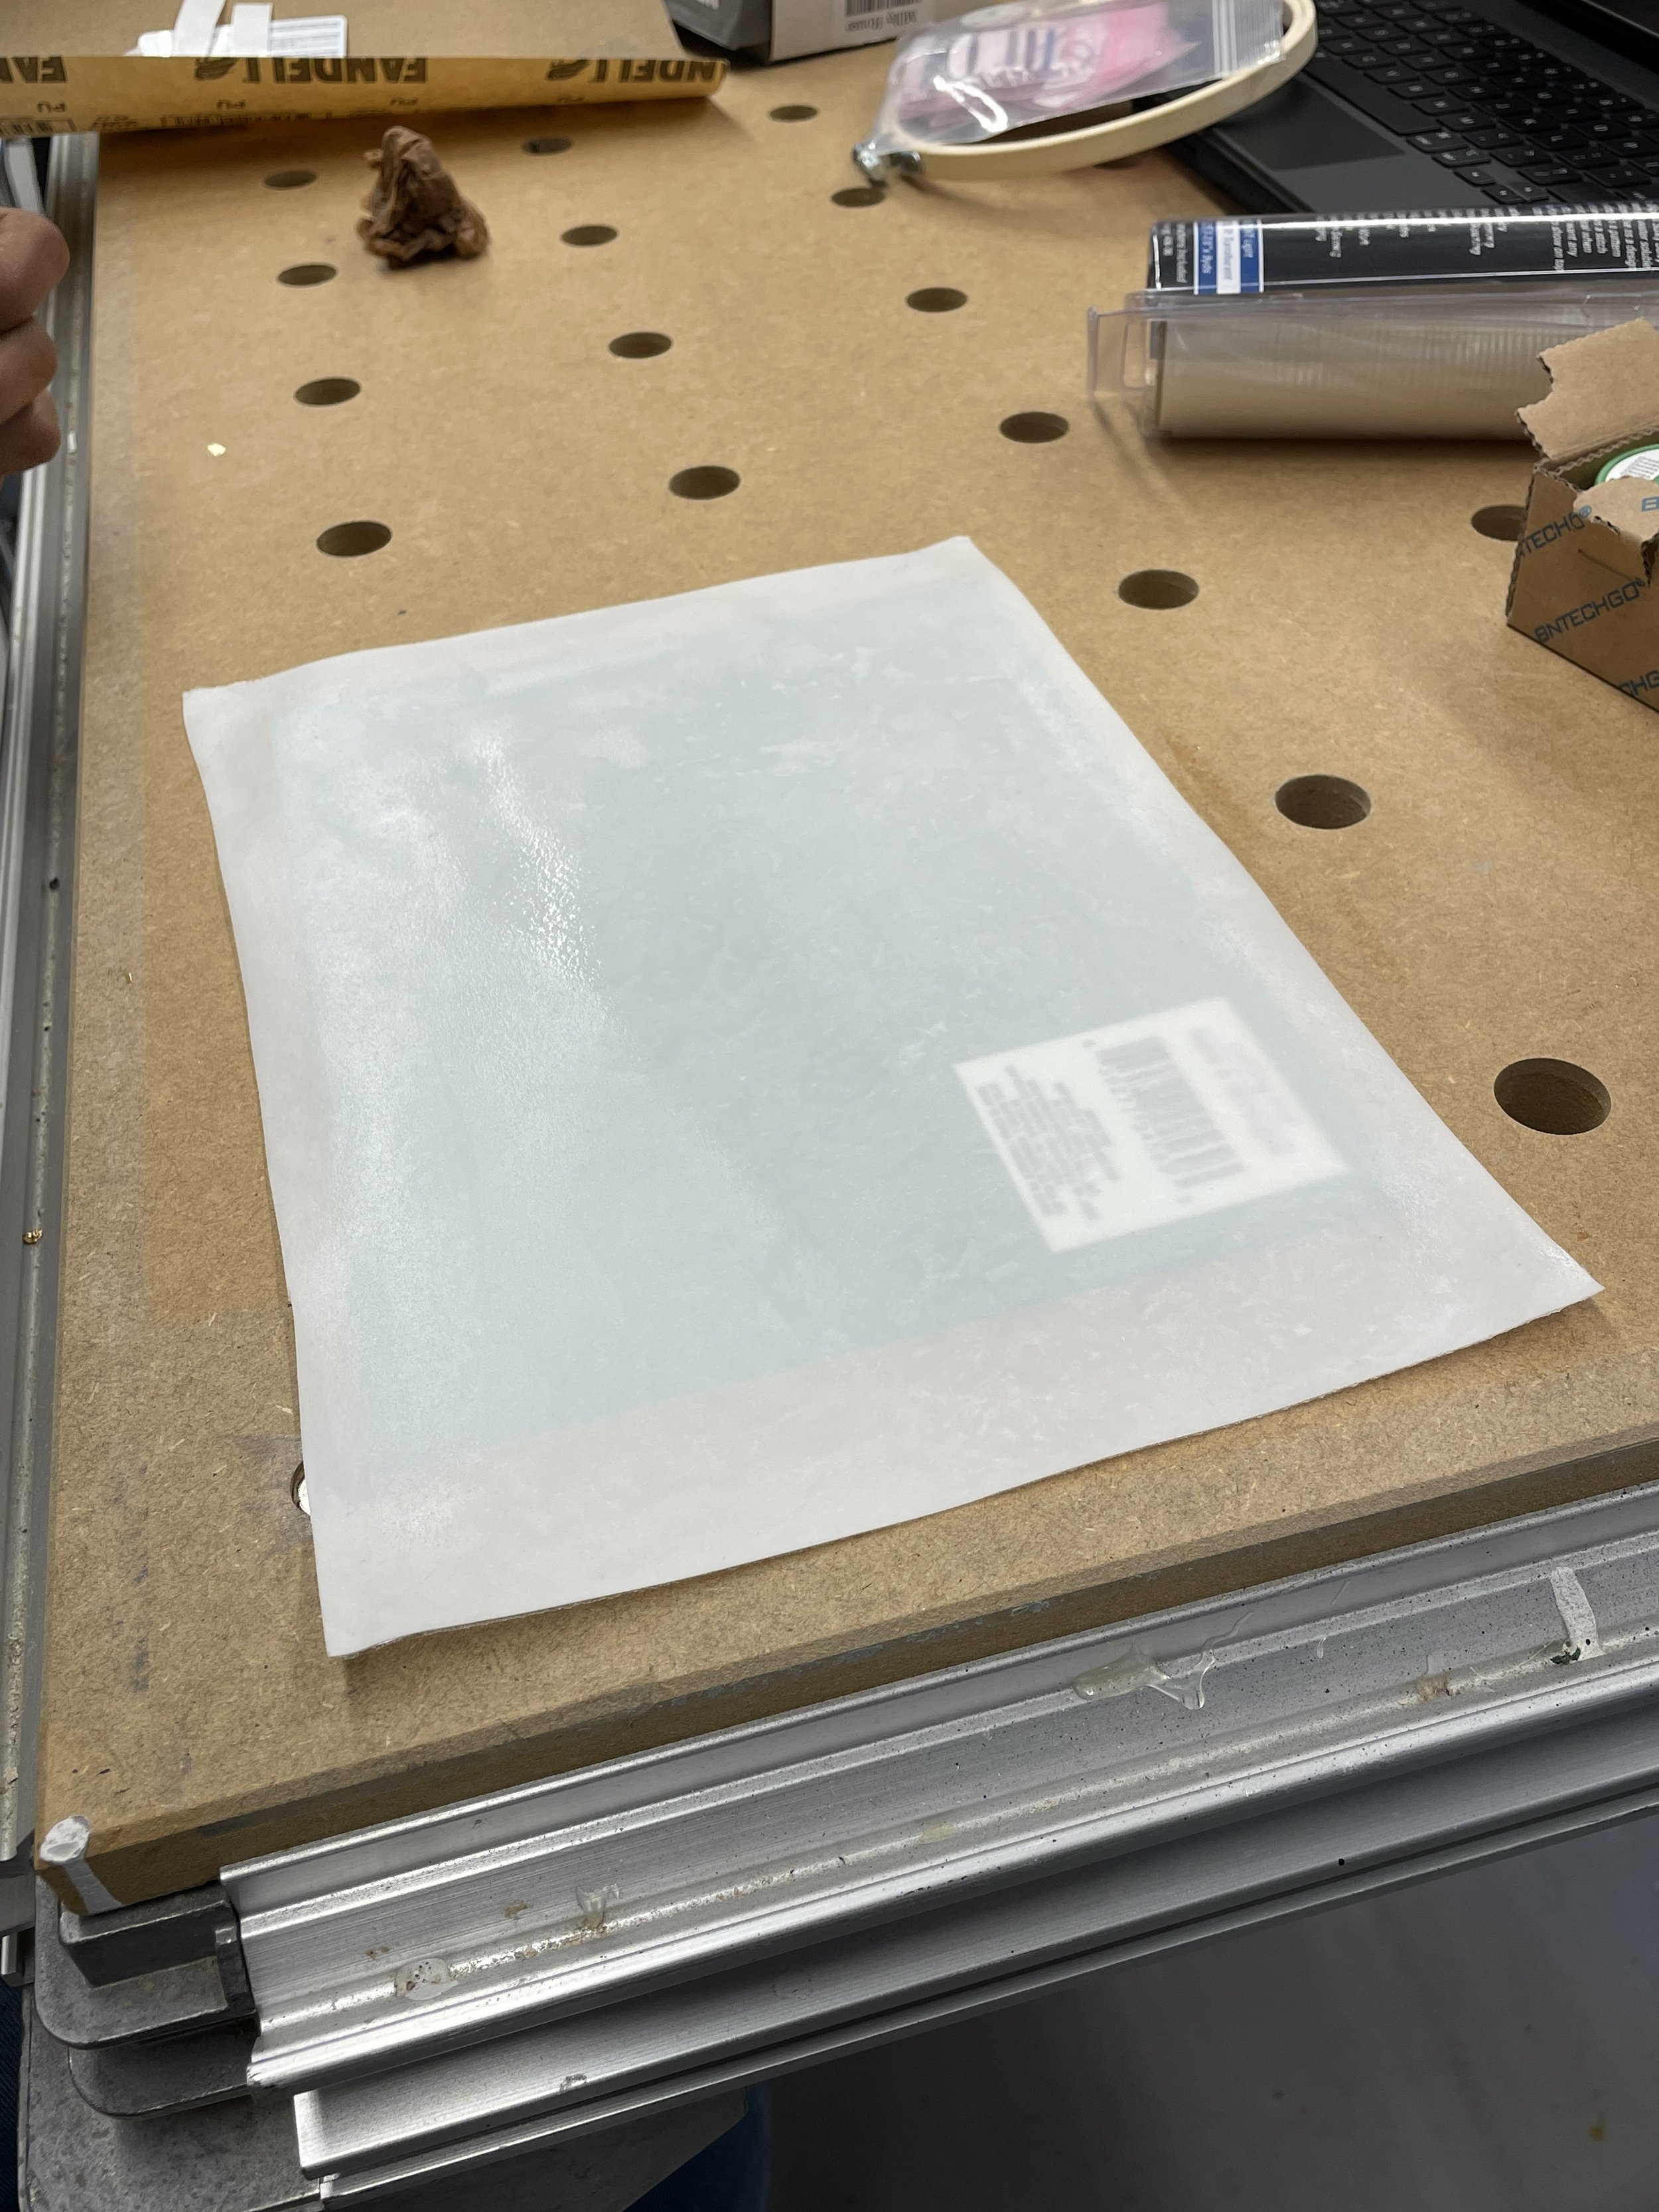
10. Wait for it to dry.


FUNCTIONALITY
Construct TinyLily RGB LED Circuit
Detailed tutorial from TinyLily webpage. There are many ways the RGB LED can be connected in your project. For simplicity sake, we used the alligator clips here. Regardless of the method you choose, use the following steps to build your circuit.
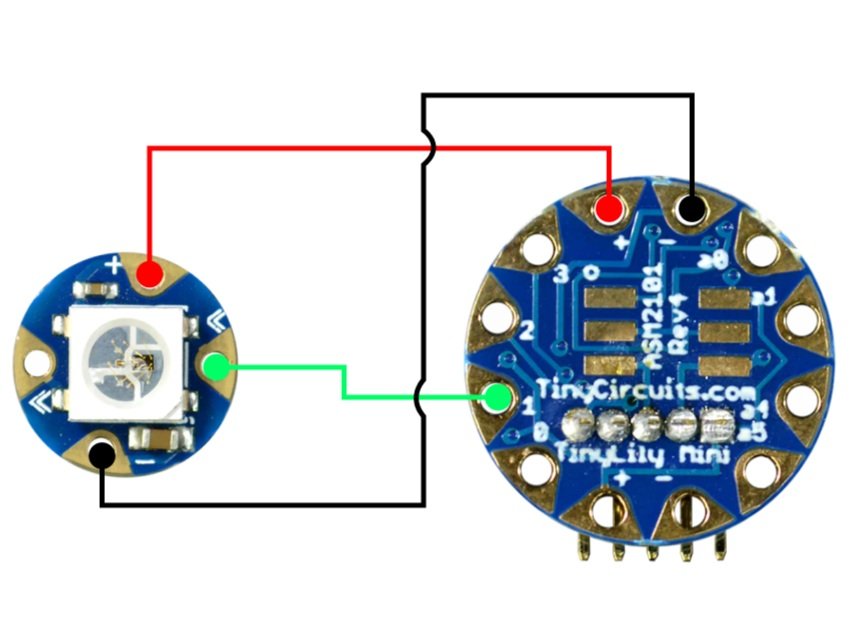
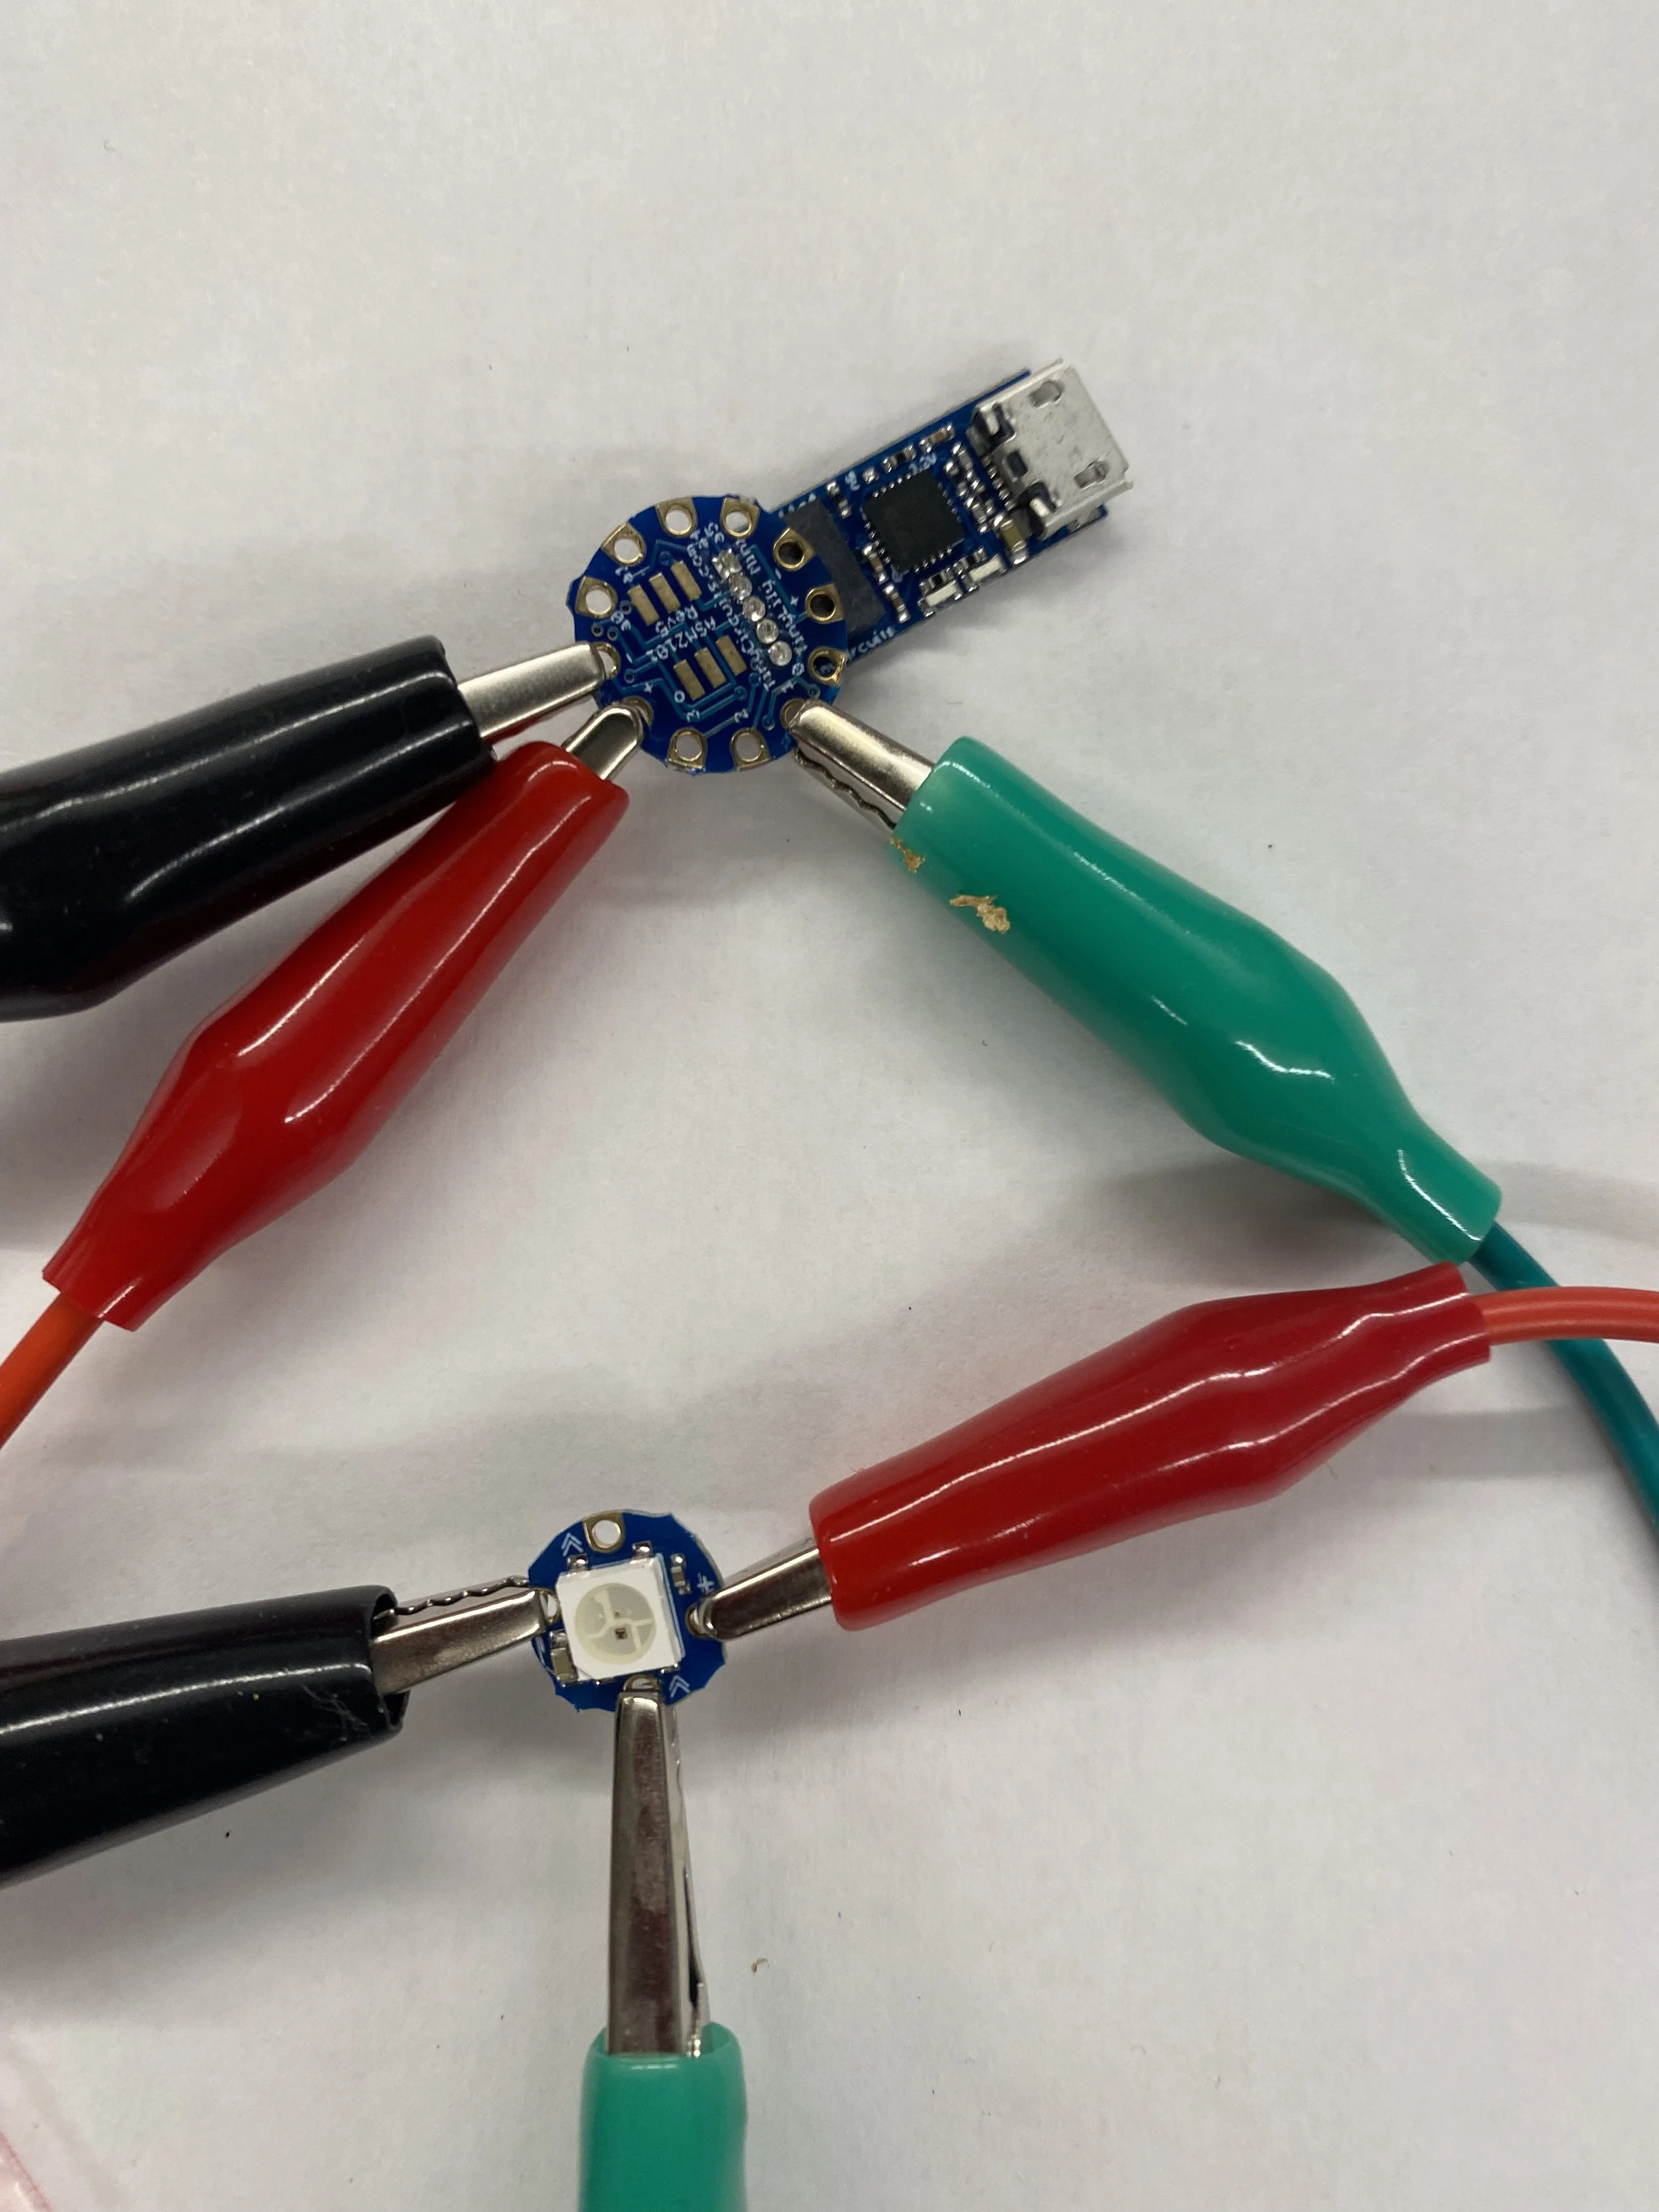
1. Follow the Diagram for constructing the circuit:
Be careful if you follow the image, numbers are flipped. Make sure that you connect to pin 1 not θ1.
2. First, connect ground from your processor board to the RGB LED marked with (-).
3. Connect the voltage lines marked by (+).
4. Finally, connect your desired IO pin to the IN tab on the LED.
Software Setup
1. Download and install the FastLED Library: For this tutorial, you will need to download the FastLED Arduino Library zip folder, and then install it as a library in your Arduino (For first timers, here are steps to install an Arduino library here).
The FastLED Arduino Library provides compatibility with many different types of RGB LEDs as well as a great deal of predefined color palettes and example code.
(Note that these are WS2812B RGB LEDs and this will have to be specified in any code you use with this library. Reference the code below to see how this is done.)

2. Upload Main Arduino Program to LilyTiny Microcontroller :
Download your main Arduino code via the link below, compile and upload to your TinyLily microcontroller:
#include <FastLED.h>
#define NUM_LEDS 1 //this is the number of LEDs in your strip
#define DATA_PIN 1 //this is the number on the silkscreen you want to use
#define COLOR_ORDER RGB

CRGB leds[NUM_LEDS];

int brightness = 20; //value from 0-255 to manipulate brightness

void setup() {
  FastLED.addLeds<WS2812B, DATA_PIN>(leds, NUM_LEDS);
  FastLED.setBrightness(brightness);
}

void loop() {
  for (int i = 0; i < 256; i++) {
    fill_rainbow(leds, NUM_LEDS, i, 256 / NUM_LEDS);
    FastLED.show(); //update the LEDs
    delay(100); //optional delay for slower fading
  }
}
The program should blend your LED(s) through the colors of the rainbow. If you're interested in creating other lighting effects, check out the example sketches included with the library. It is likely you'll have to change the defined number of LEDs, type of LED, and data pin.
IMPORTANT: if the LED is only lighting in green, that means there is an issue.
3. Once your Arduino code has been successfully uploaded into the LilyTiny microcontroller, you should see the LED lighting up and go through the colors of the rainbow!
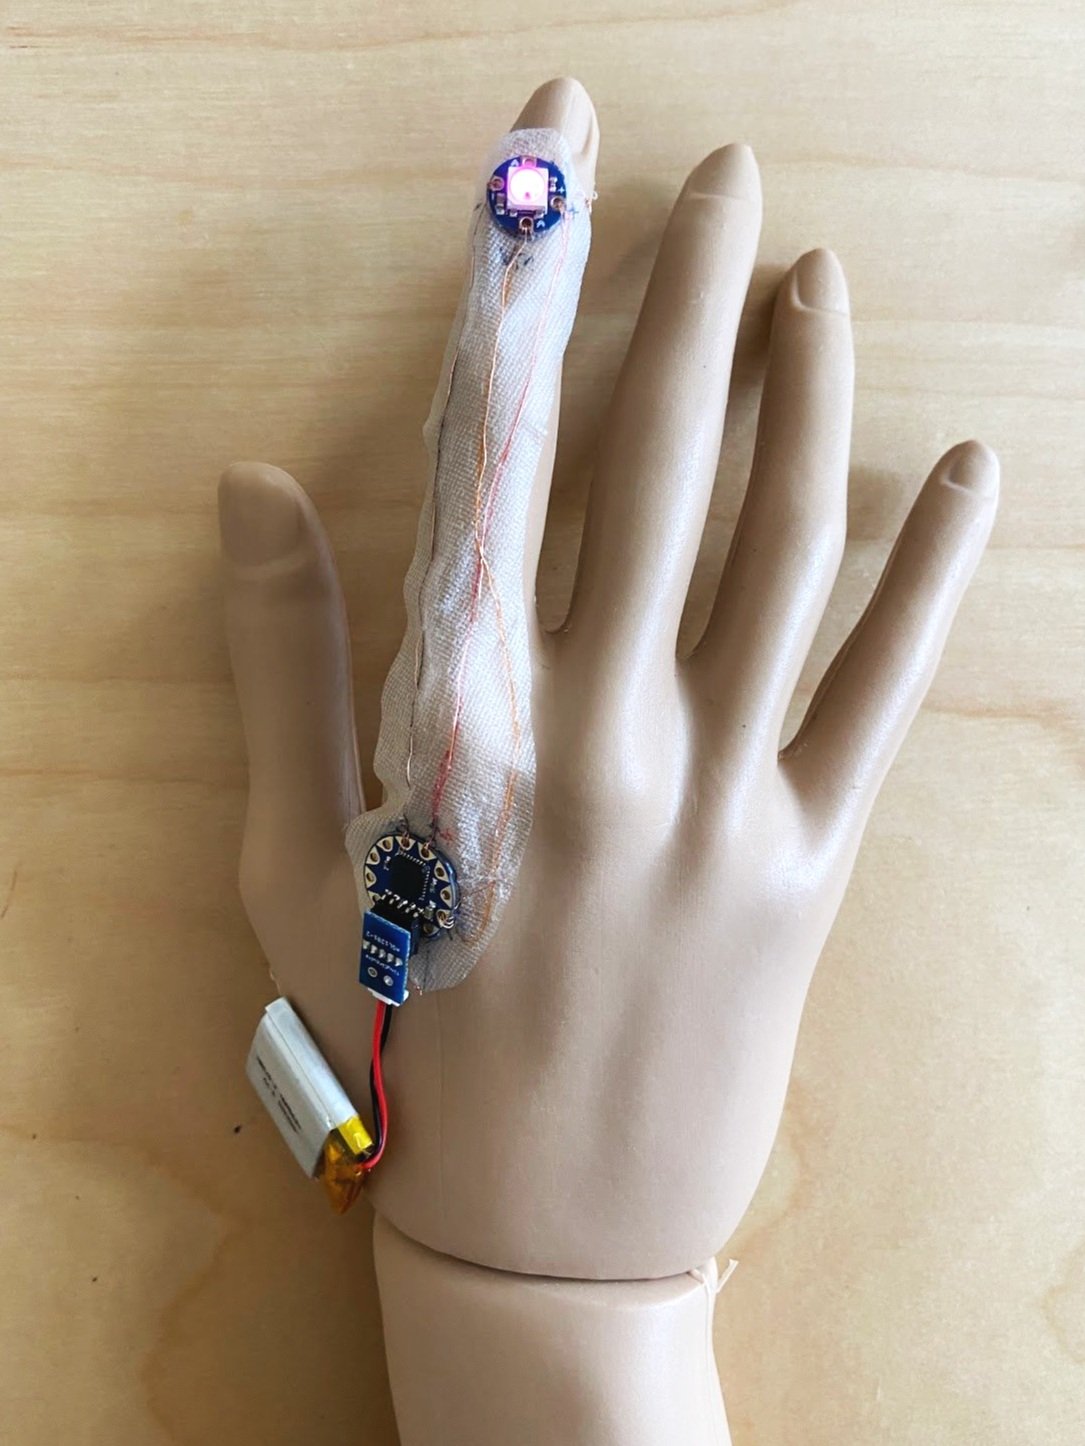
4. Replace the programmer with TinyLily Battery Adapter and power with the battery in the tiny lily kit (so it can be standalone and no longer connected to laptop).


Tip: If you are getting errors when uploading, It may be helpful to remove the alligator clips from the TinyLily microcontroller when uploading the Arduino code. Here is a link for troubleshooting with compiling/uploading your Arduino code to the LilyTiny Microcontroller.
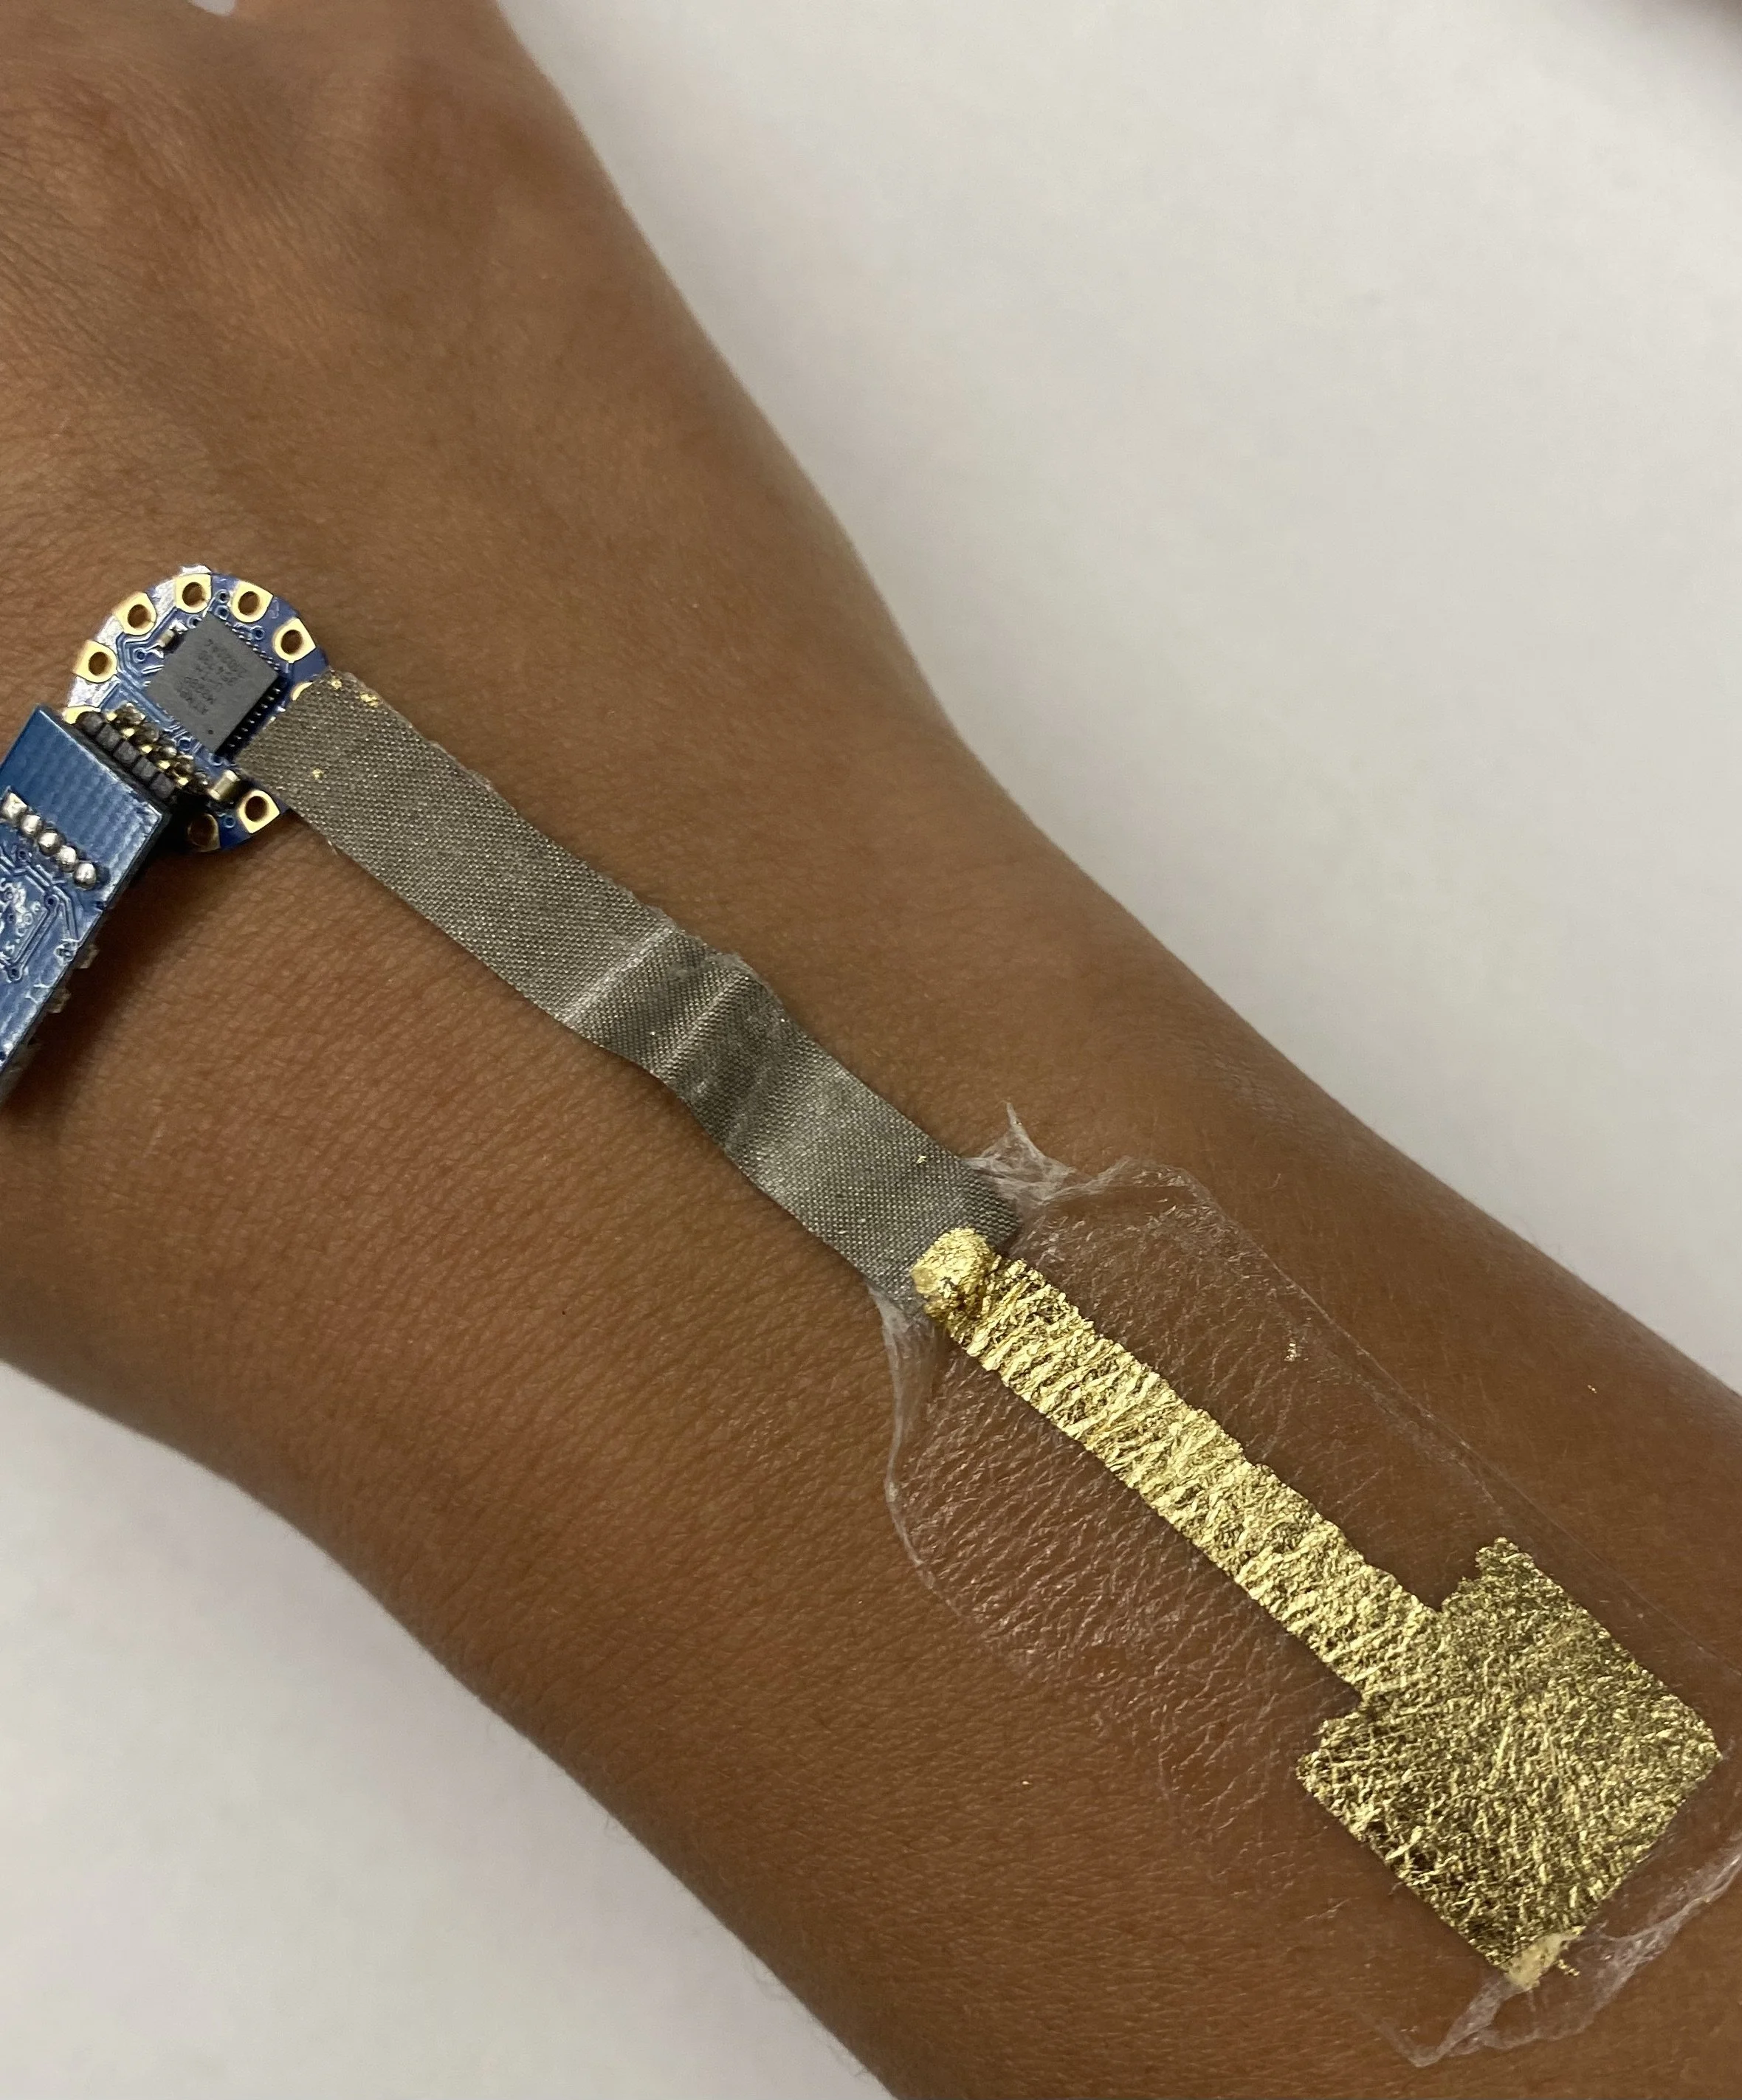
SkinCloth Application
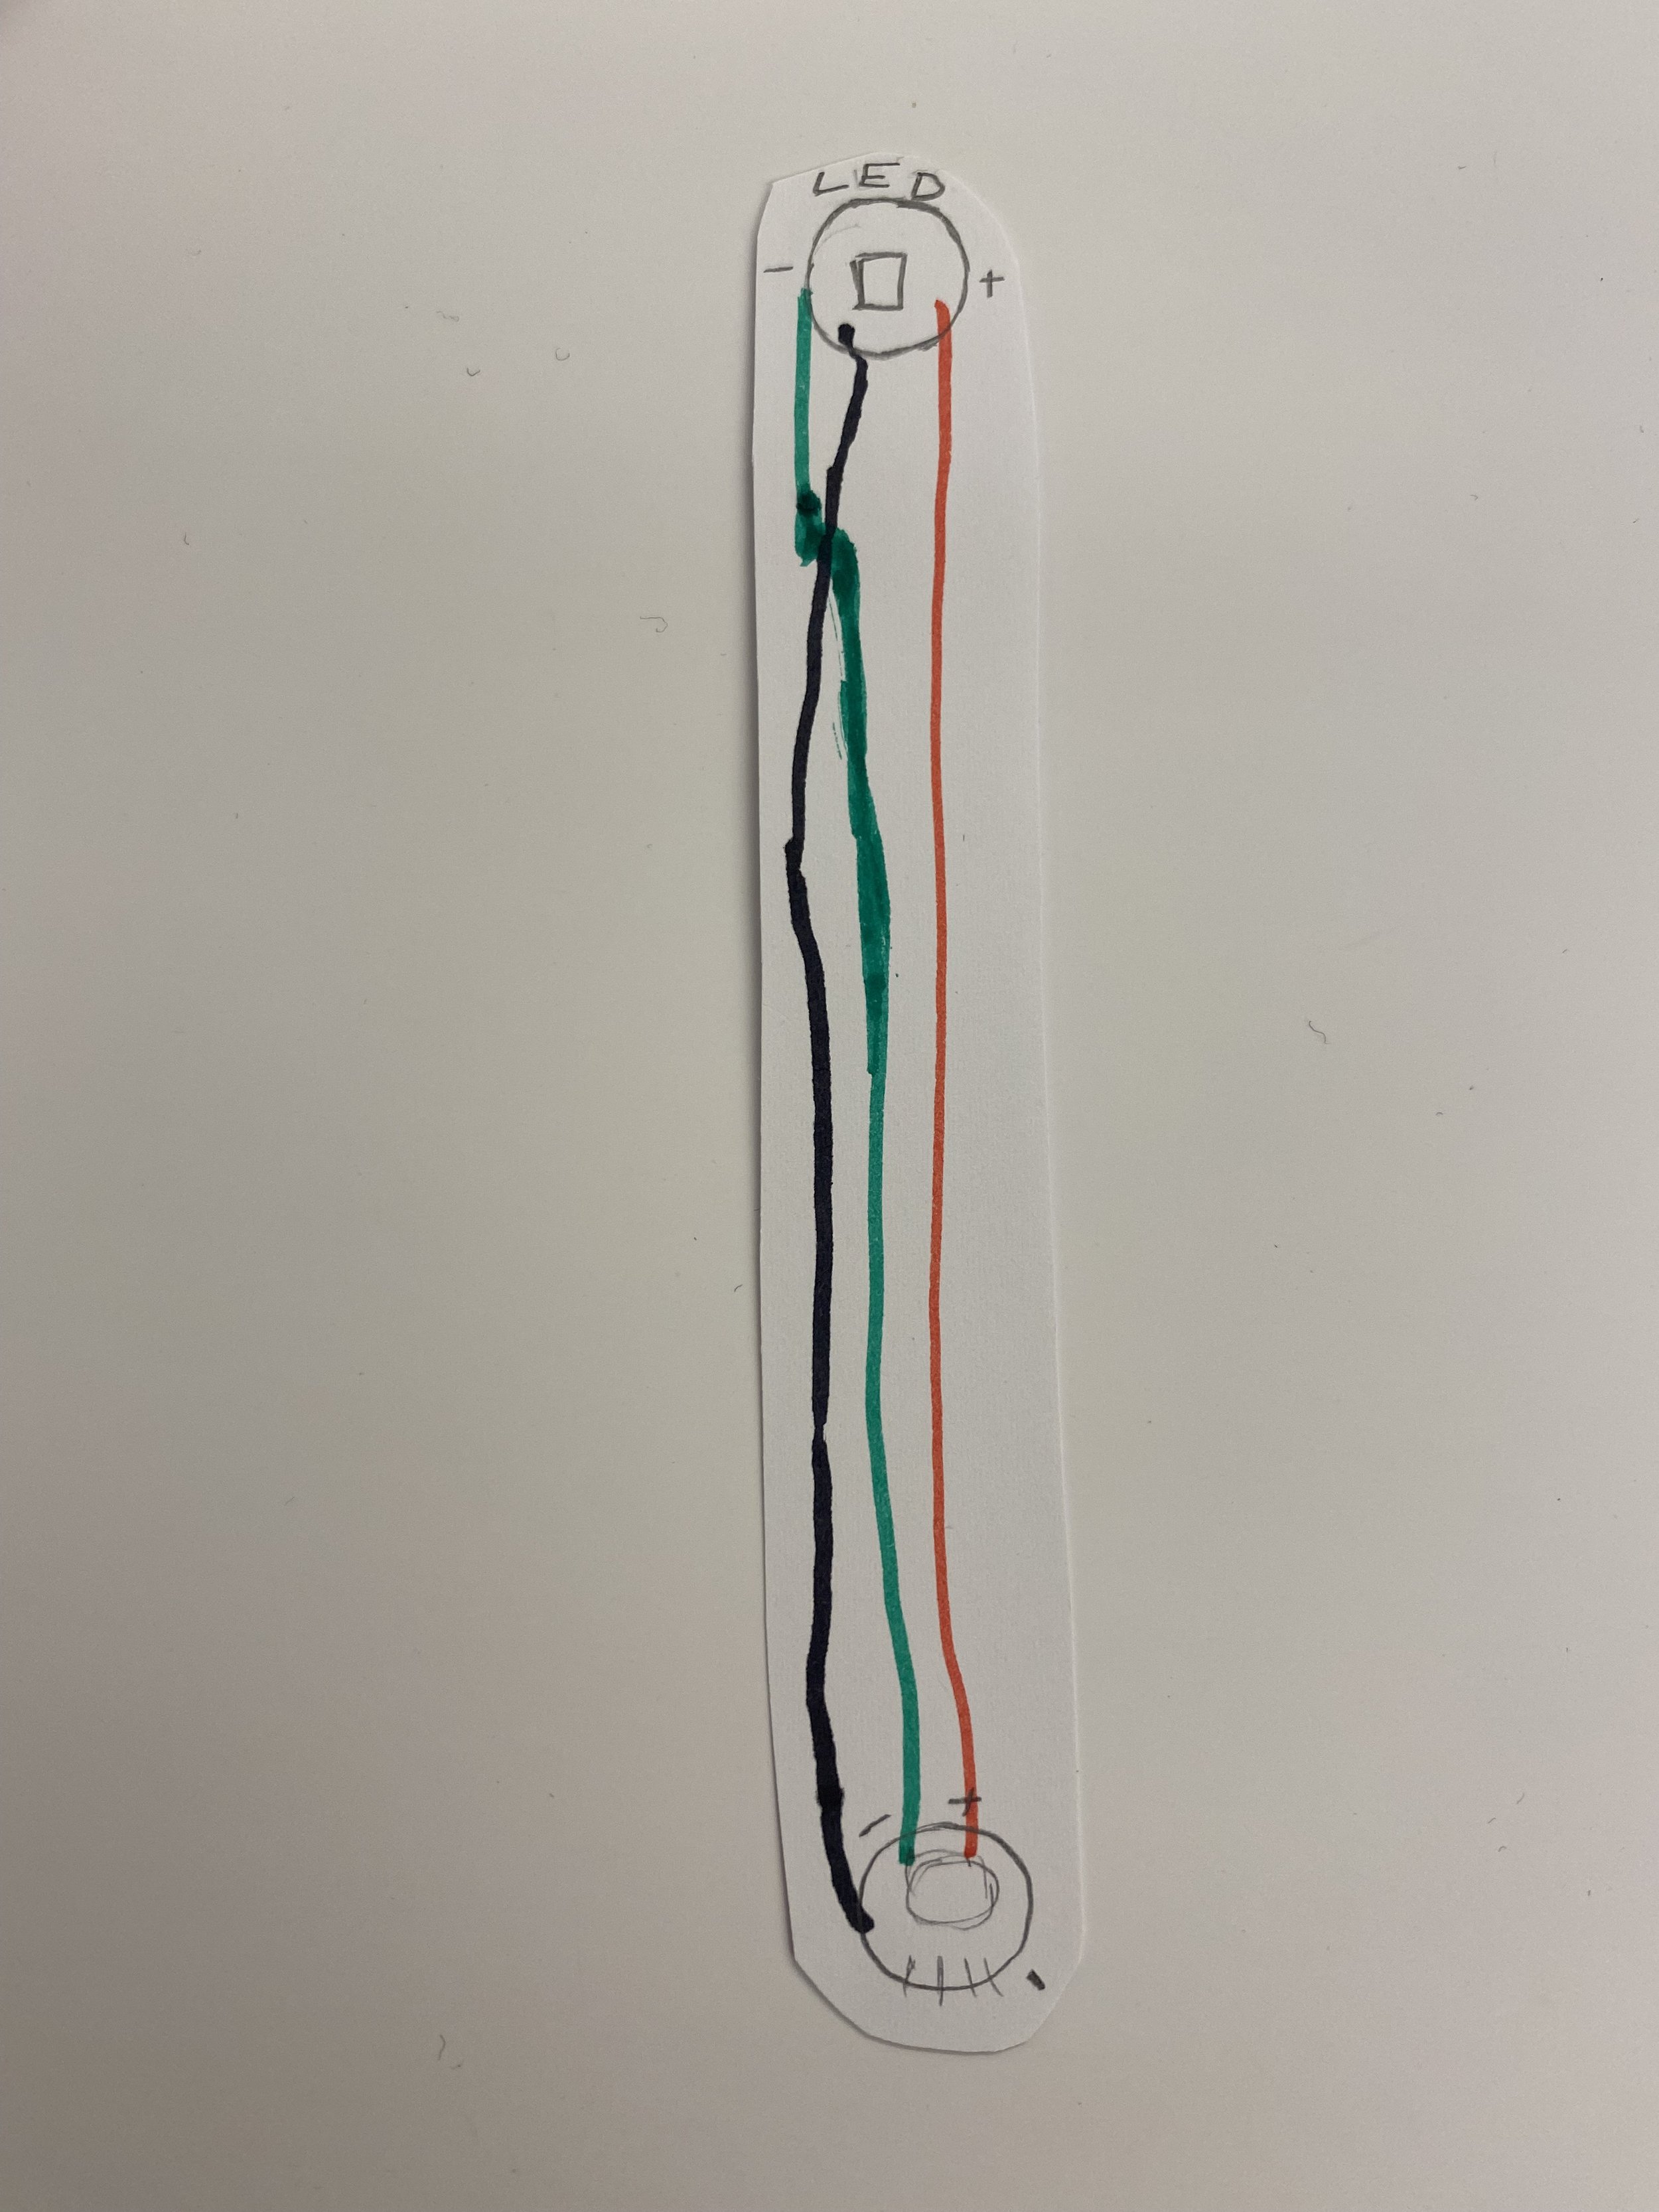
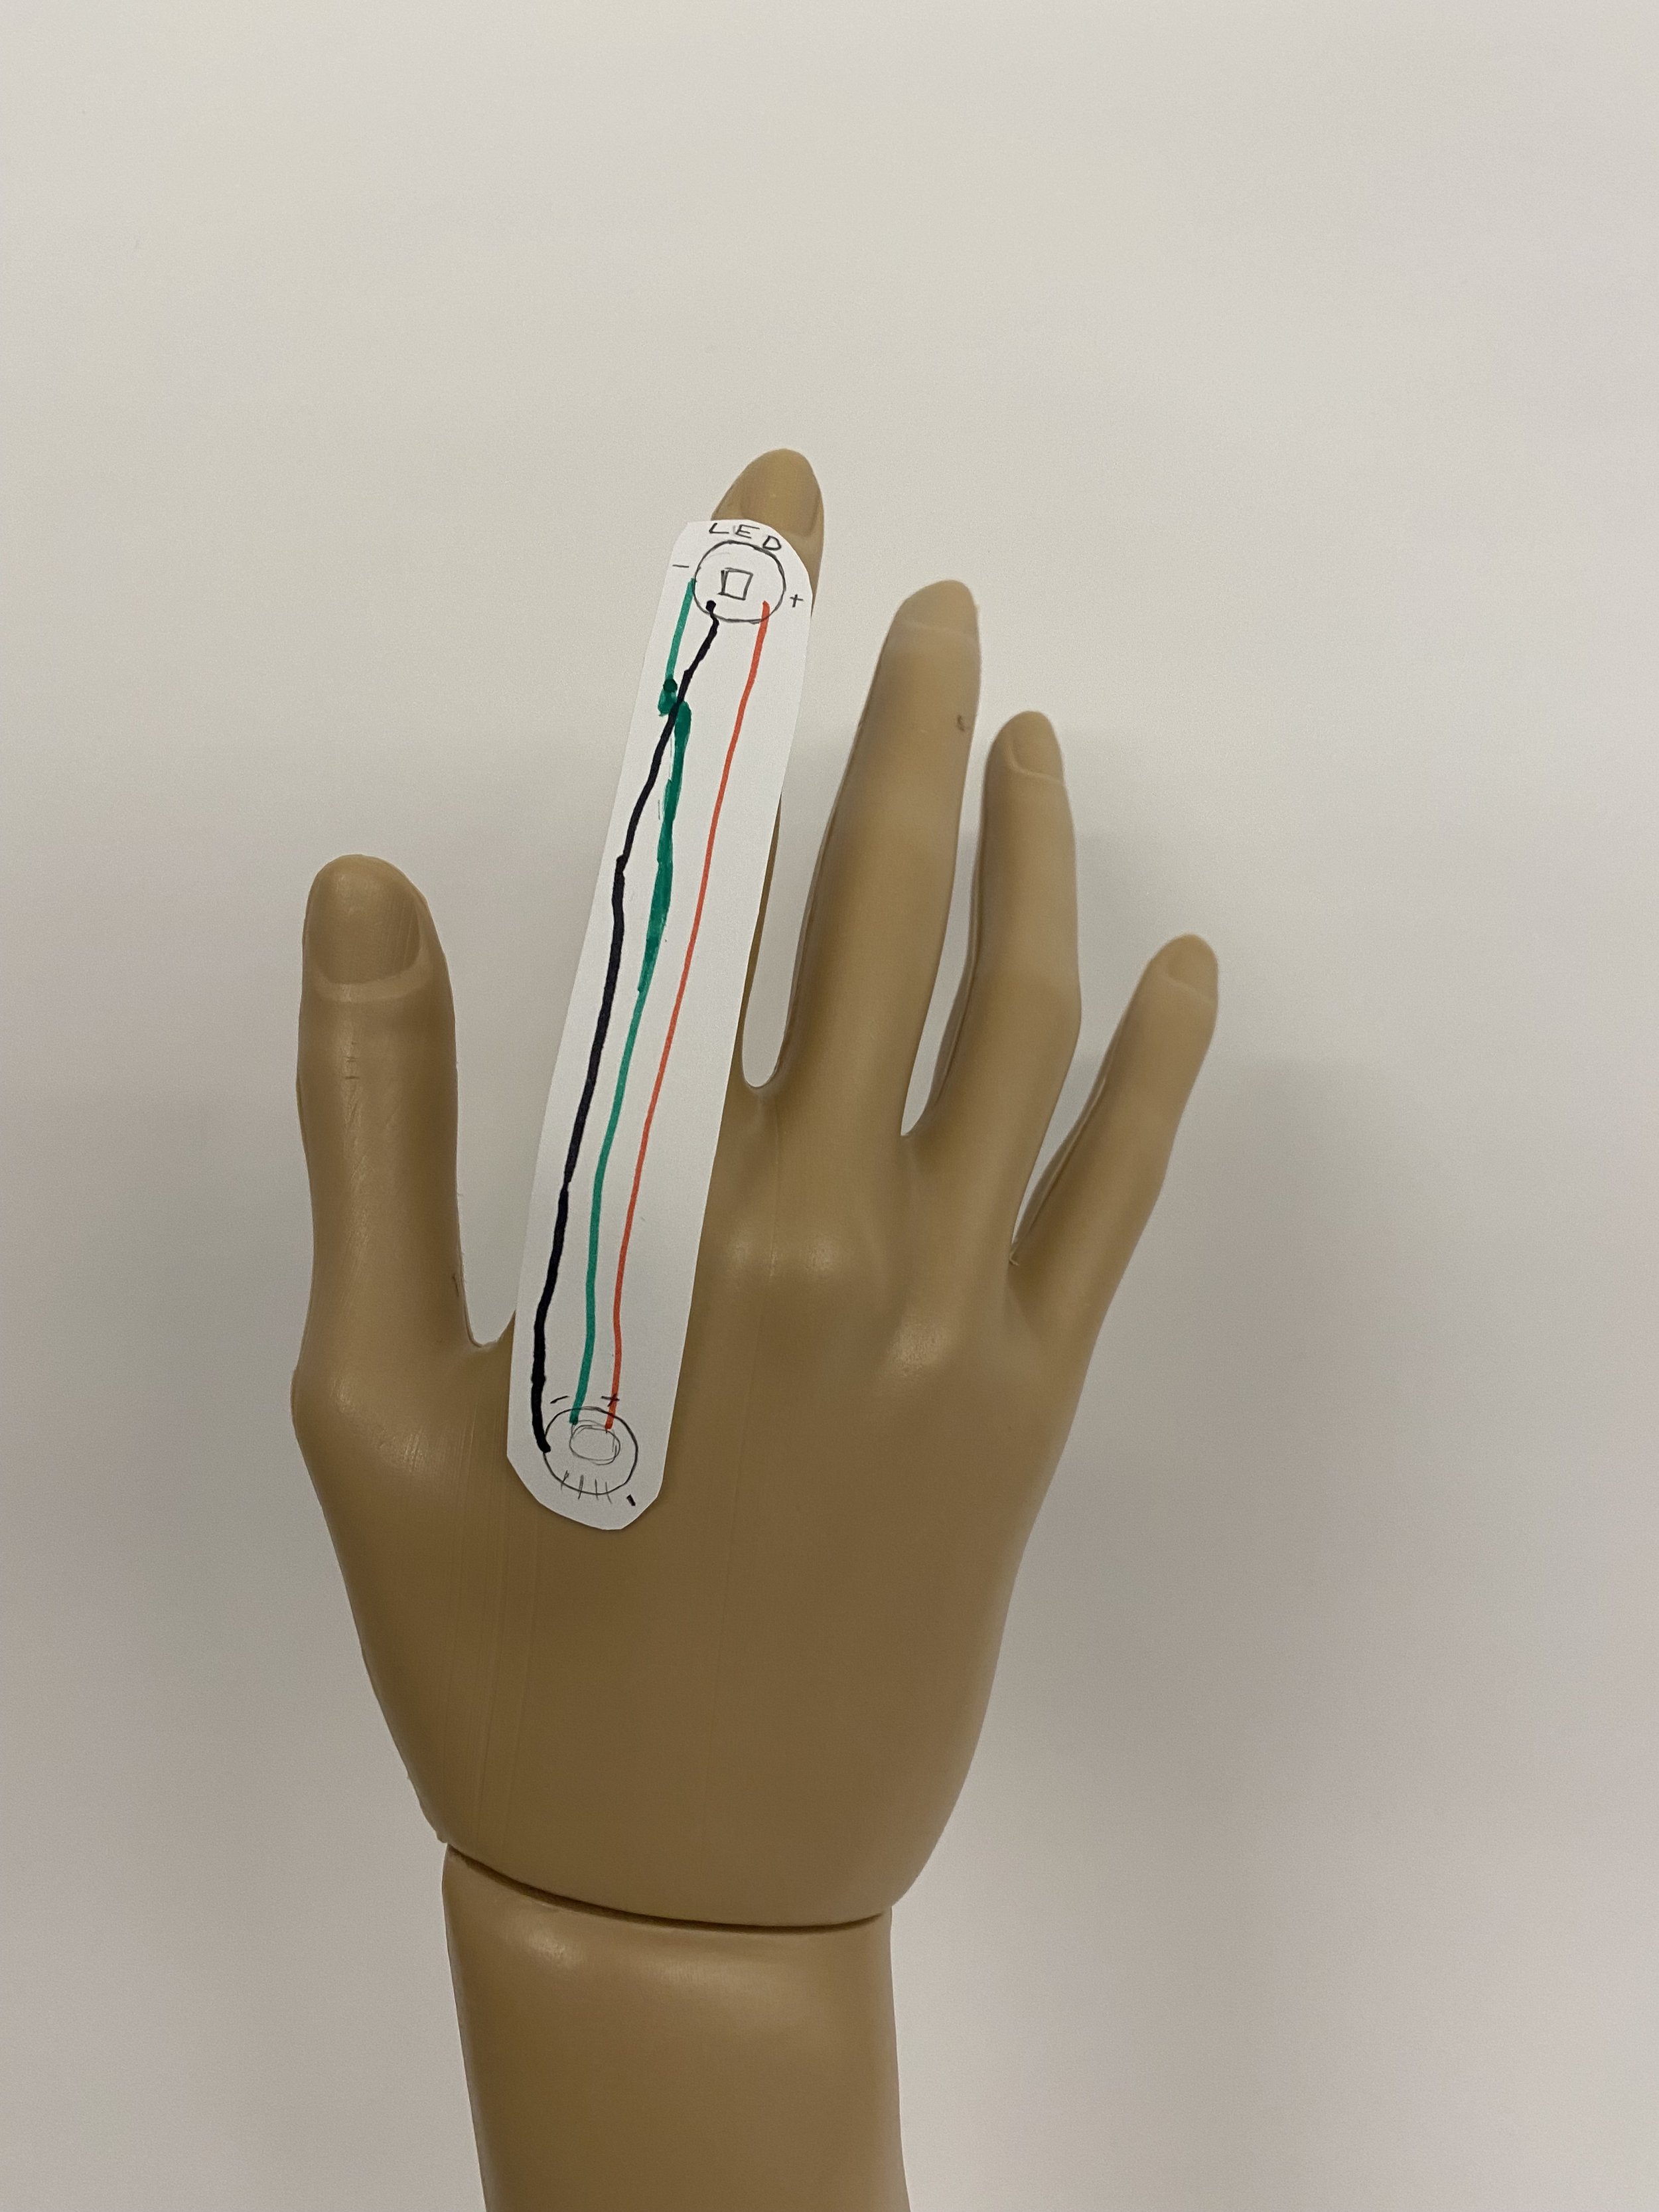
1. Plan out where you would like to place this circuit on the mannequin hand and sketch out the circuit layout on a piece of paper.
2. Place SkinCloth in the embroidery hoop. Once the SkinCloth is dry, place it into the embroidery hoop for the next steps of sewing.
IMPORTANT: The temporary tattoo silicone side (slippery side) should be facing up.
3. Based on your plan of the circuit in Step 1, use a pencil or pen to sketch out the placement of the components on the SkinCloth.

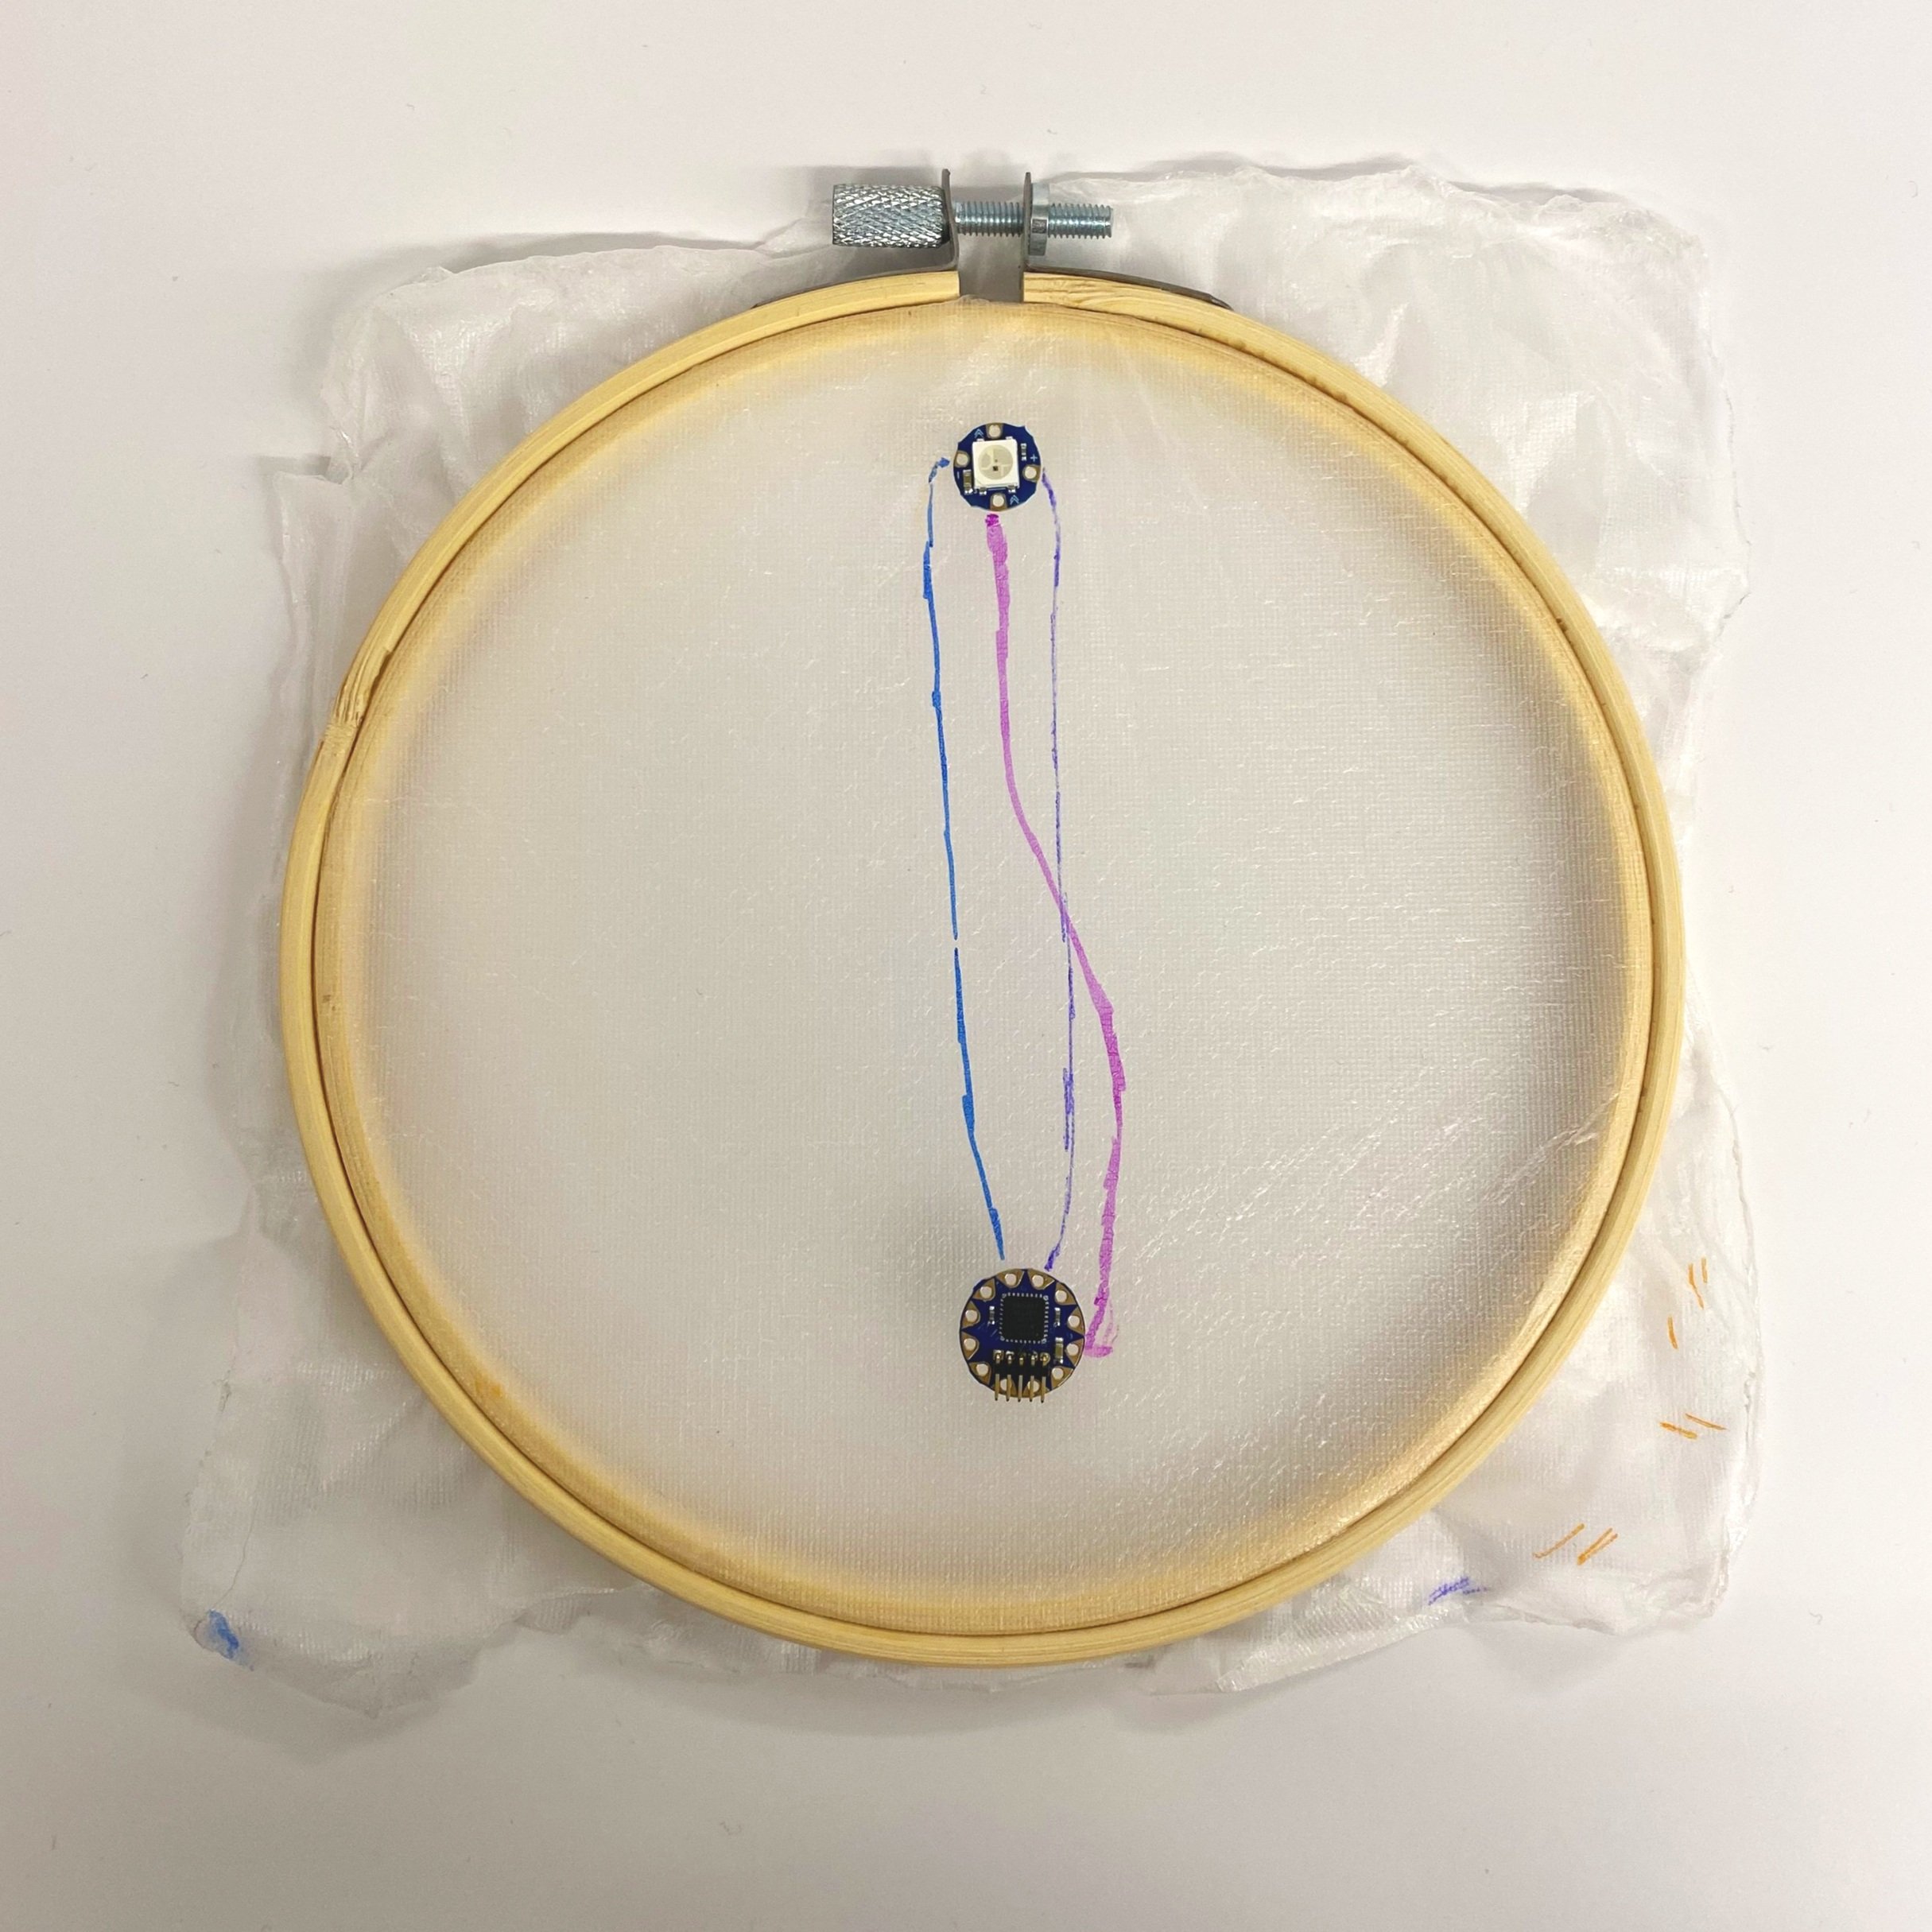
4. Sew and complete your circuit on the SkinCloth with the 36 gauge conductive wire. Note that the conductive wire is insulated!
IMPORTANT: Remember to sand down the ends of the wire to connect it to the leads (we need to do this since the wire is insulted!). One tip is to adhere down the TilyLily components to the SkinCloth to prevent it from moving around when sewing.
IMPORTANT: Remember to use the bronze conductive copper wire (36 gauge) for this step (NOT the silver conductive thread!)

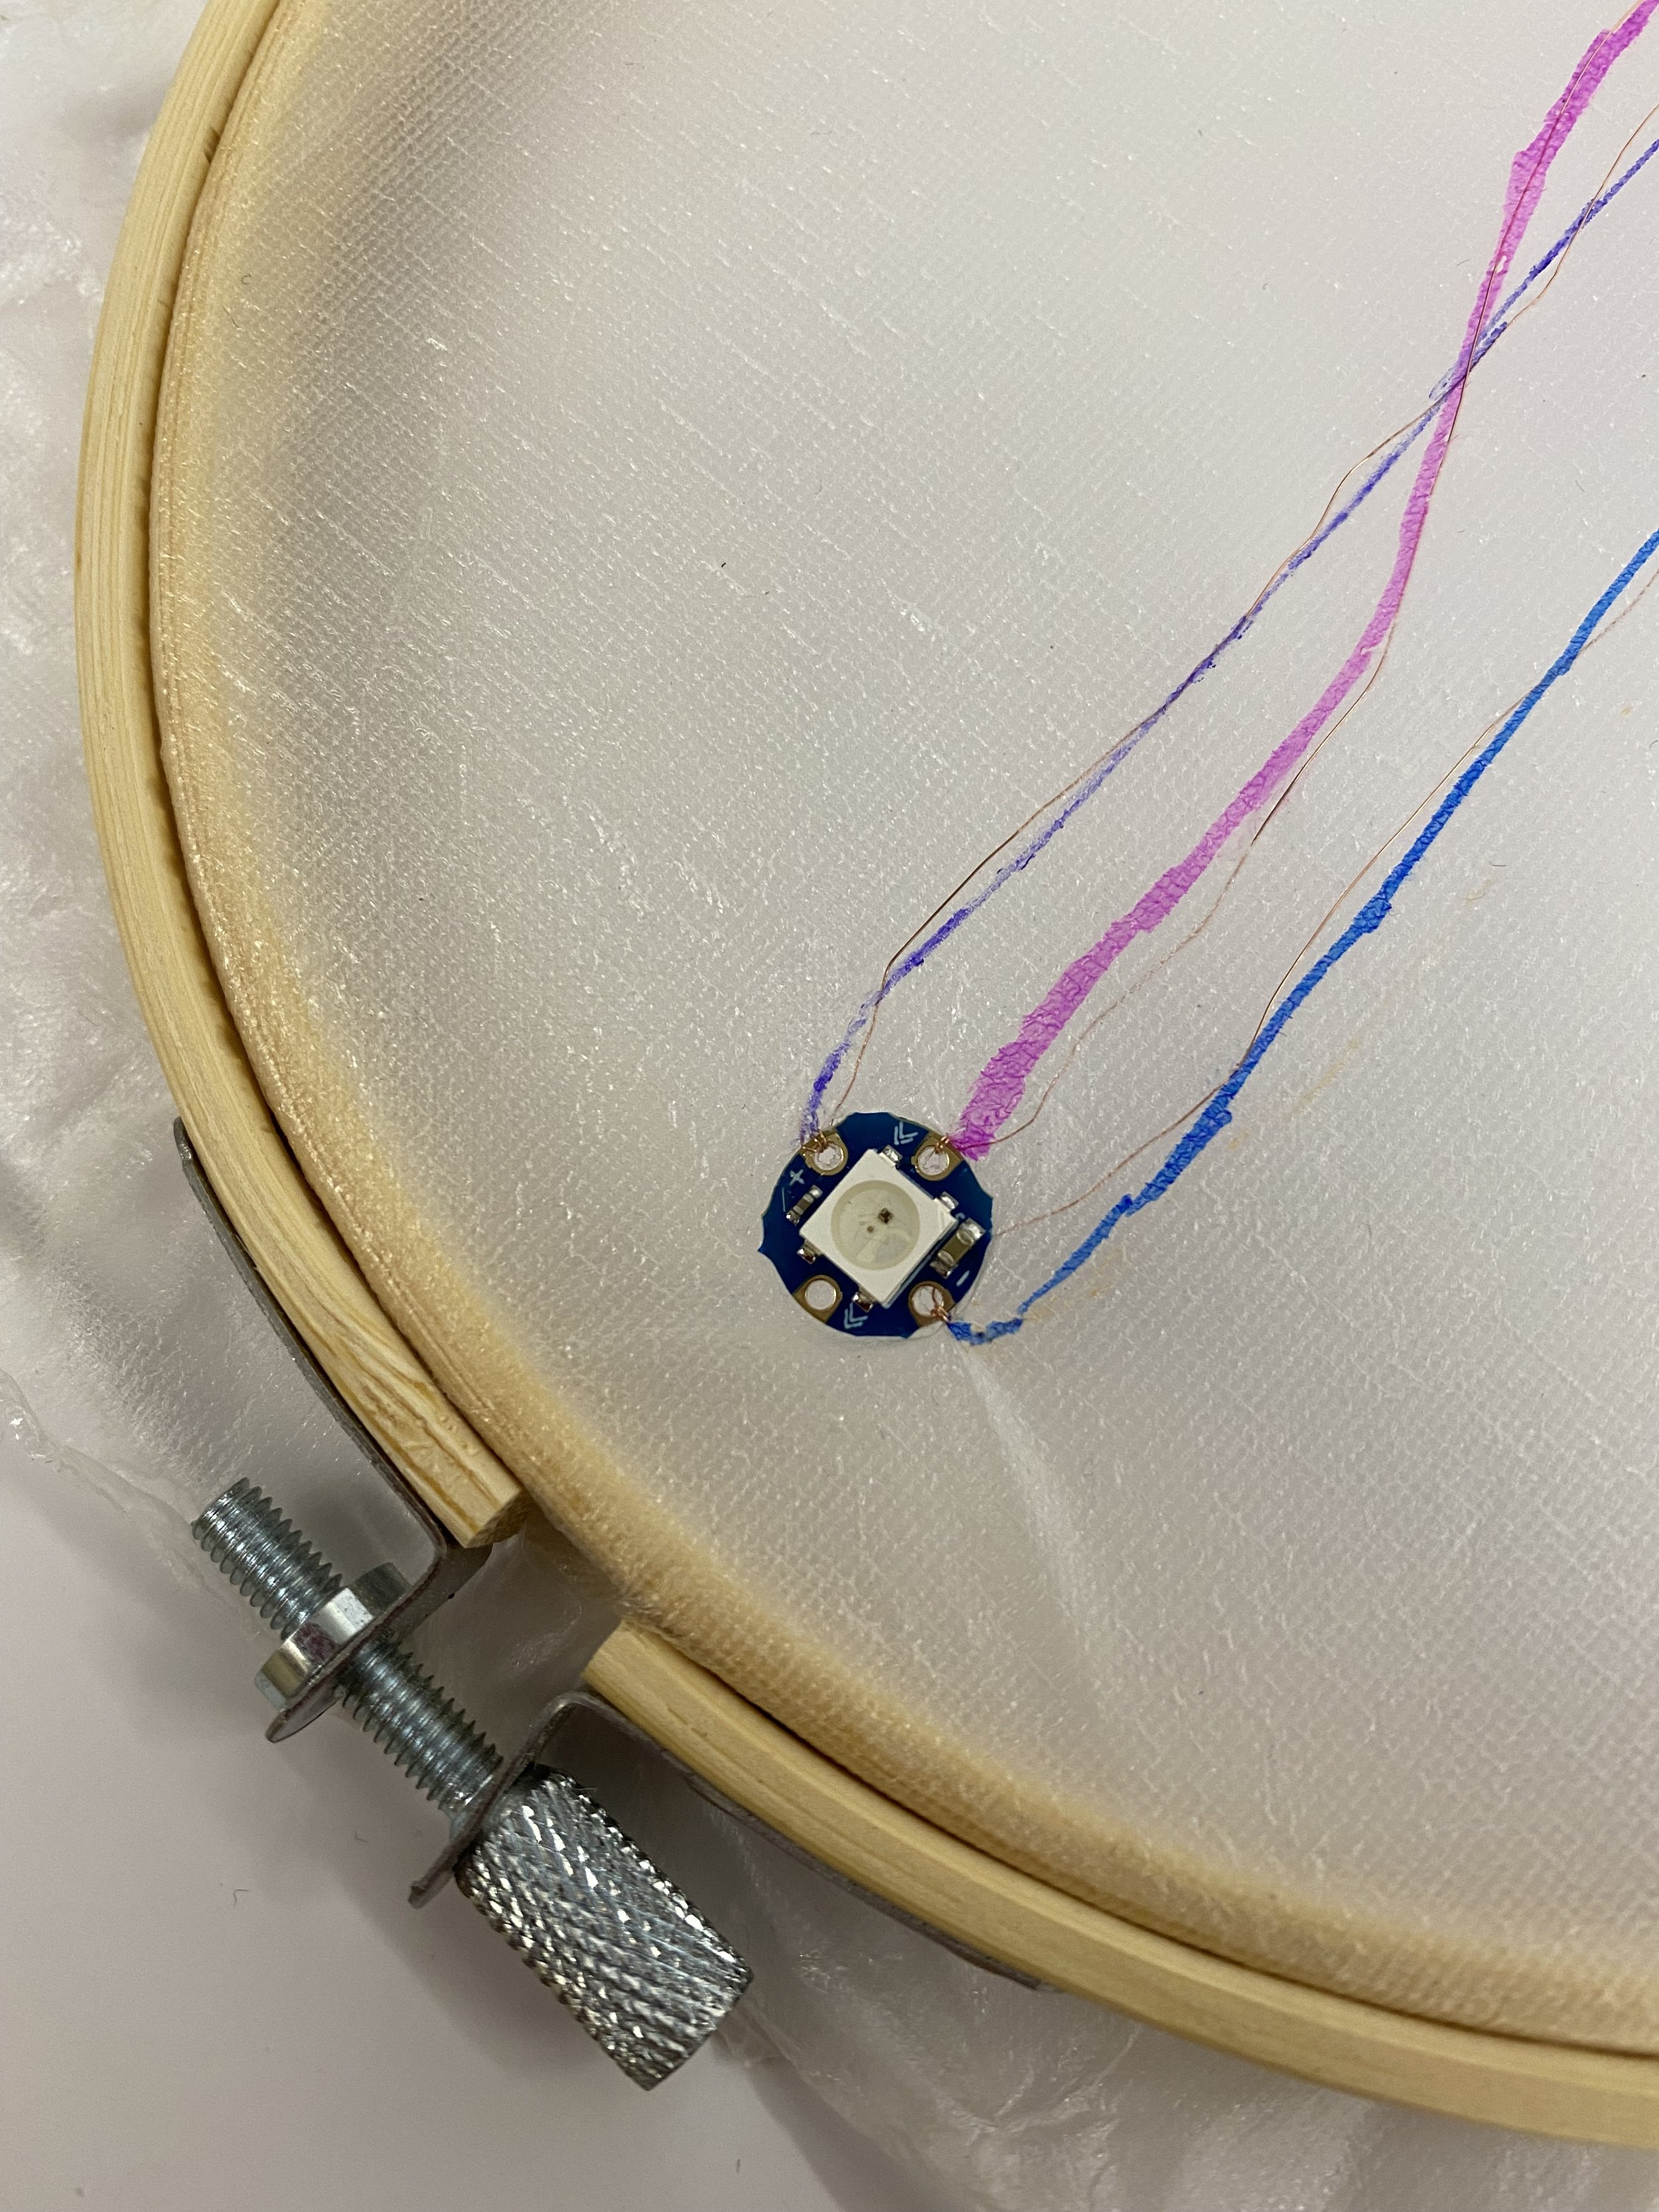
5. Once you are done sewing, attach the battery and see the RGB LED shine!!
Demo video on skin cloth:
SewSkin Application
Remove from the embroidery hoop, apply a layer of temporary tattoo adhesive (green sheet) underneath the skincloth, and apply on the mannequin. It may help to apply multiple layers of the temporary tattoo adhesive.


Demo video of final working prototype: https://drive.google.com/file/d/1upzkGojUDirwy5CInS8_ggMpdSeCnlZa/view?usp=sharing
Reflection Questions
How would you compare the SewSkin fabrication process with DuoSkin? Could you use DuoSkin instead of SewSkin to complete this lab?
What body locations do you think SewSkin is uniquely suited for?
Which part of the fabrication process did you find most challenging?
For your Lab 2 submission, construct your SewSkin RGB LED circuit. Post a photo of each onto the Canvas discussion board, with a 100-word description on what you made, responses to the reflection questions, and any challenges you encountered on the way.
Note: if you are already an experienced electronics builder you are encouraged to expand the project to match your skillset.
FAQ (Frequently Asked Questions)
Q1: What are some common prototyping materials that can be used to connect circuit components as an alternative to copper wire?
Answer: Conductive thread, conductive tape, alligator clips, conductive ink, etc.
Q2: What is the avrdude: stk500_recv() error, and how to resolve the issue?
Answer: Check connections. Try to unplug and replug the wires or restart the Arduino to redo the uploading.