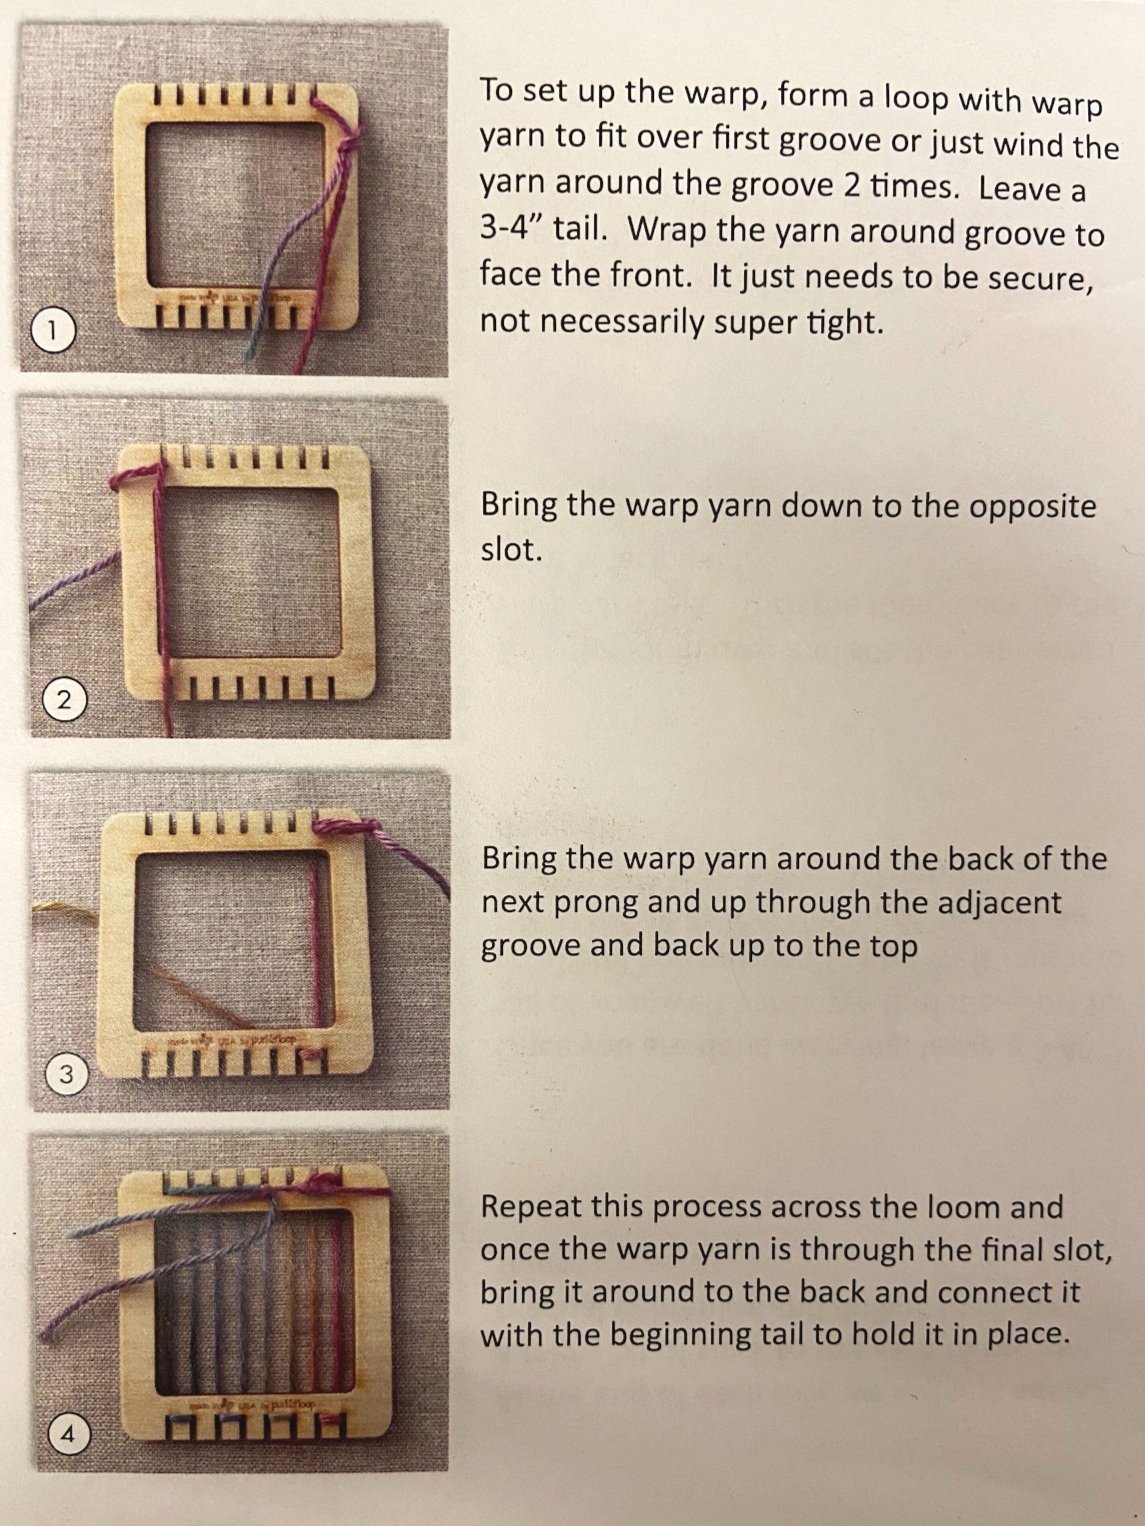
Tools and Materials
TinyLily Kit
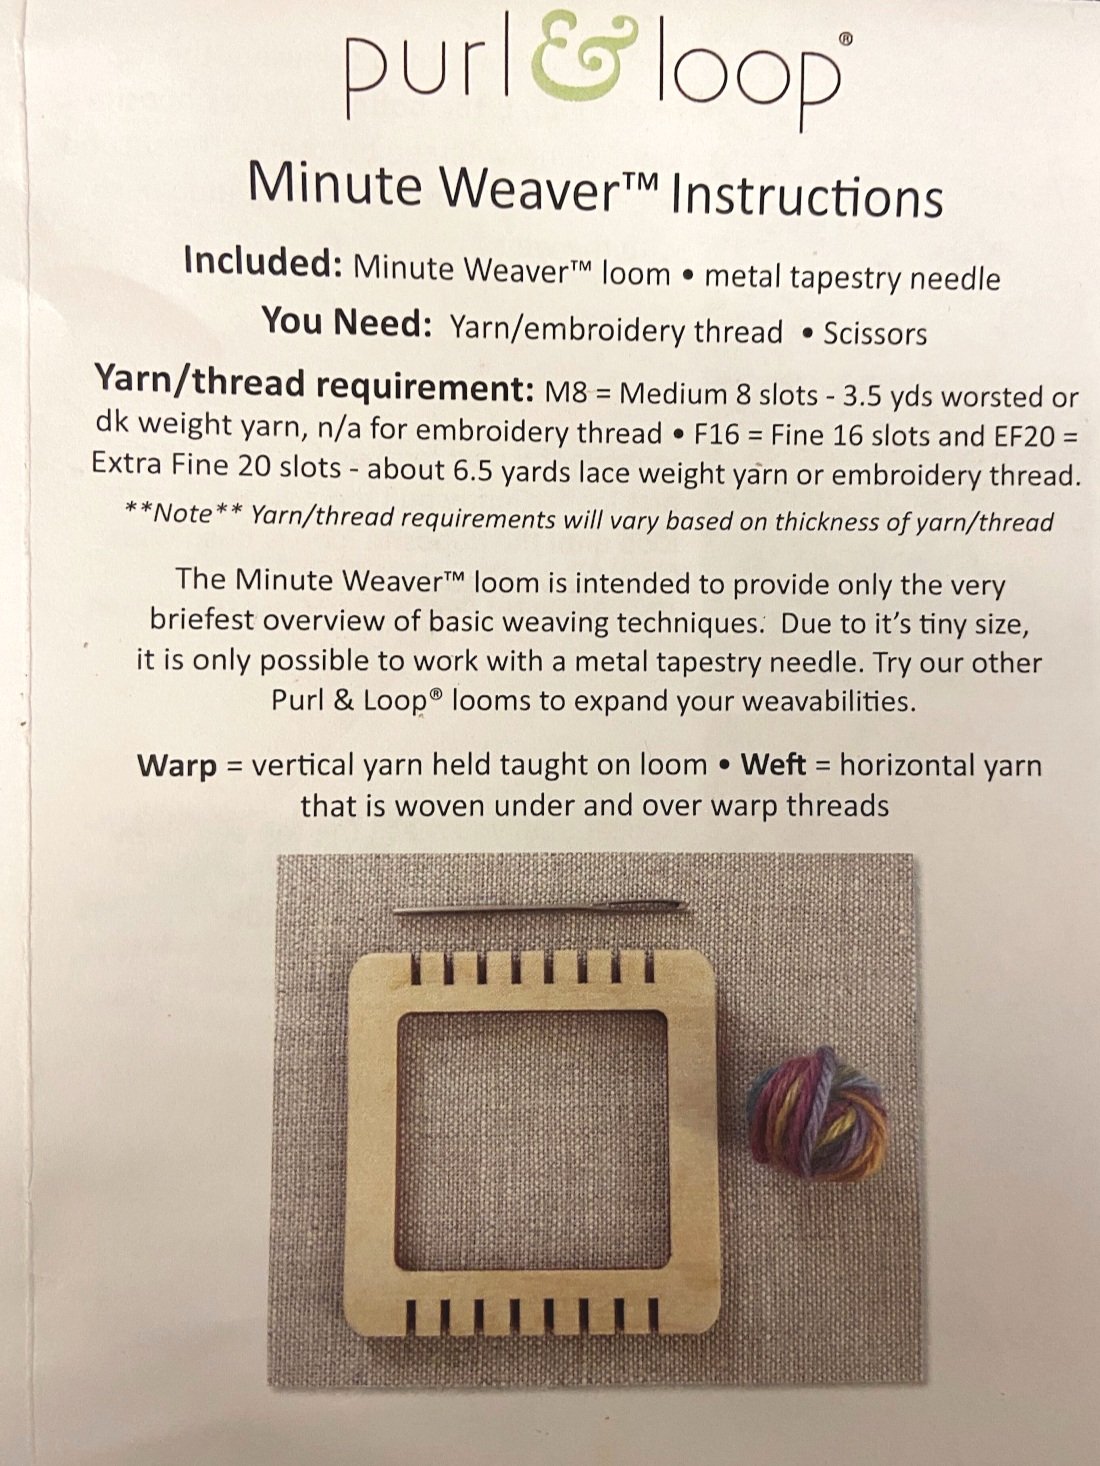
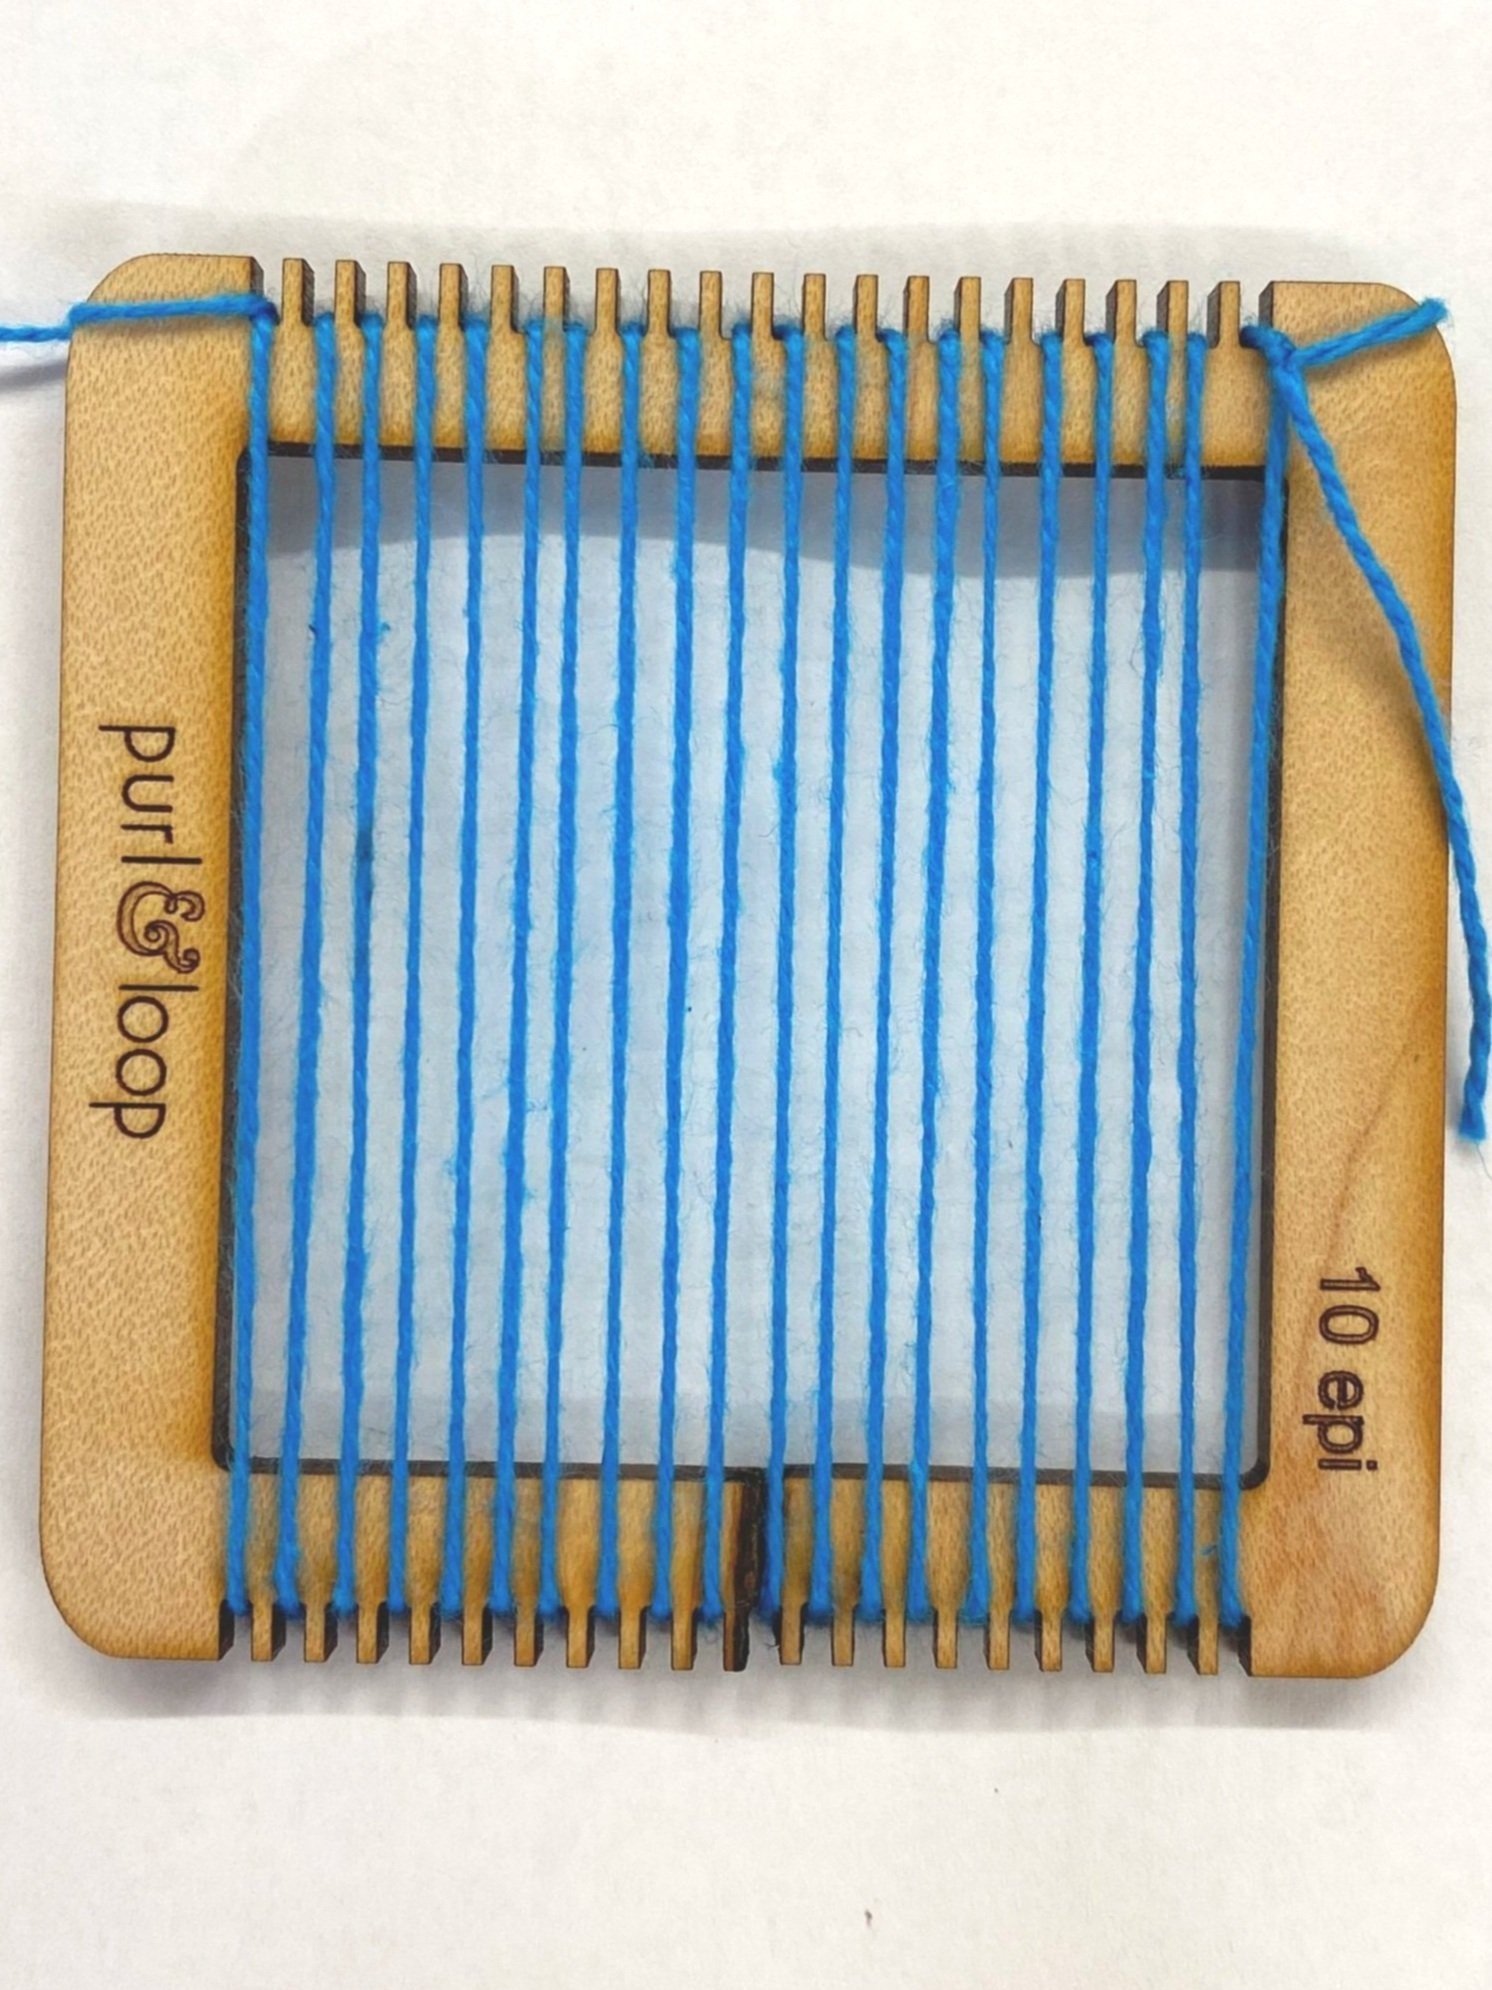
Loom (20 slots or 10 e.p.i)
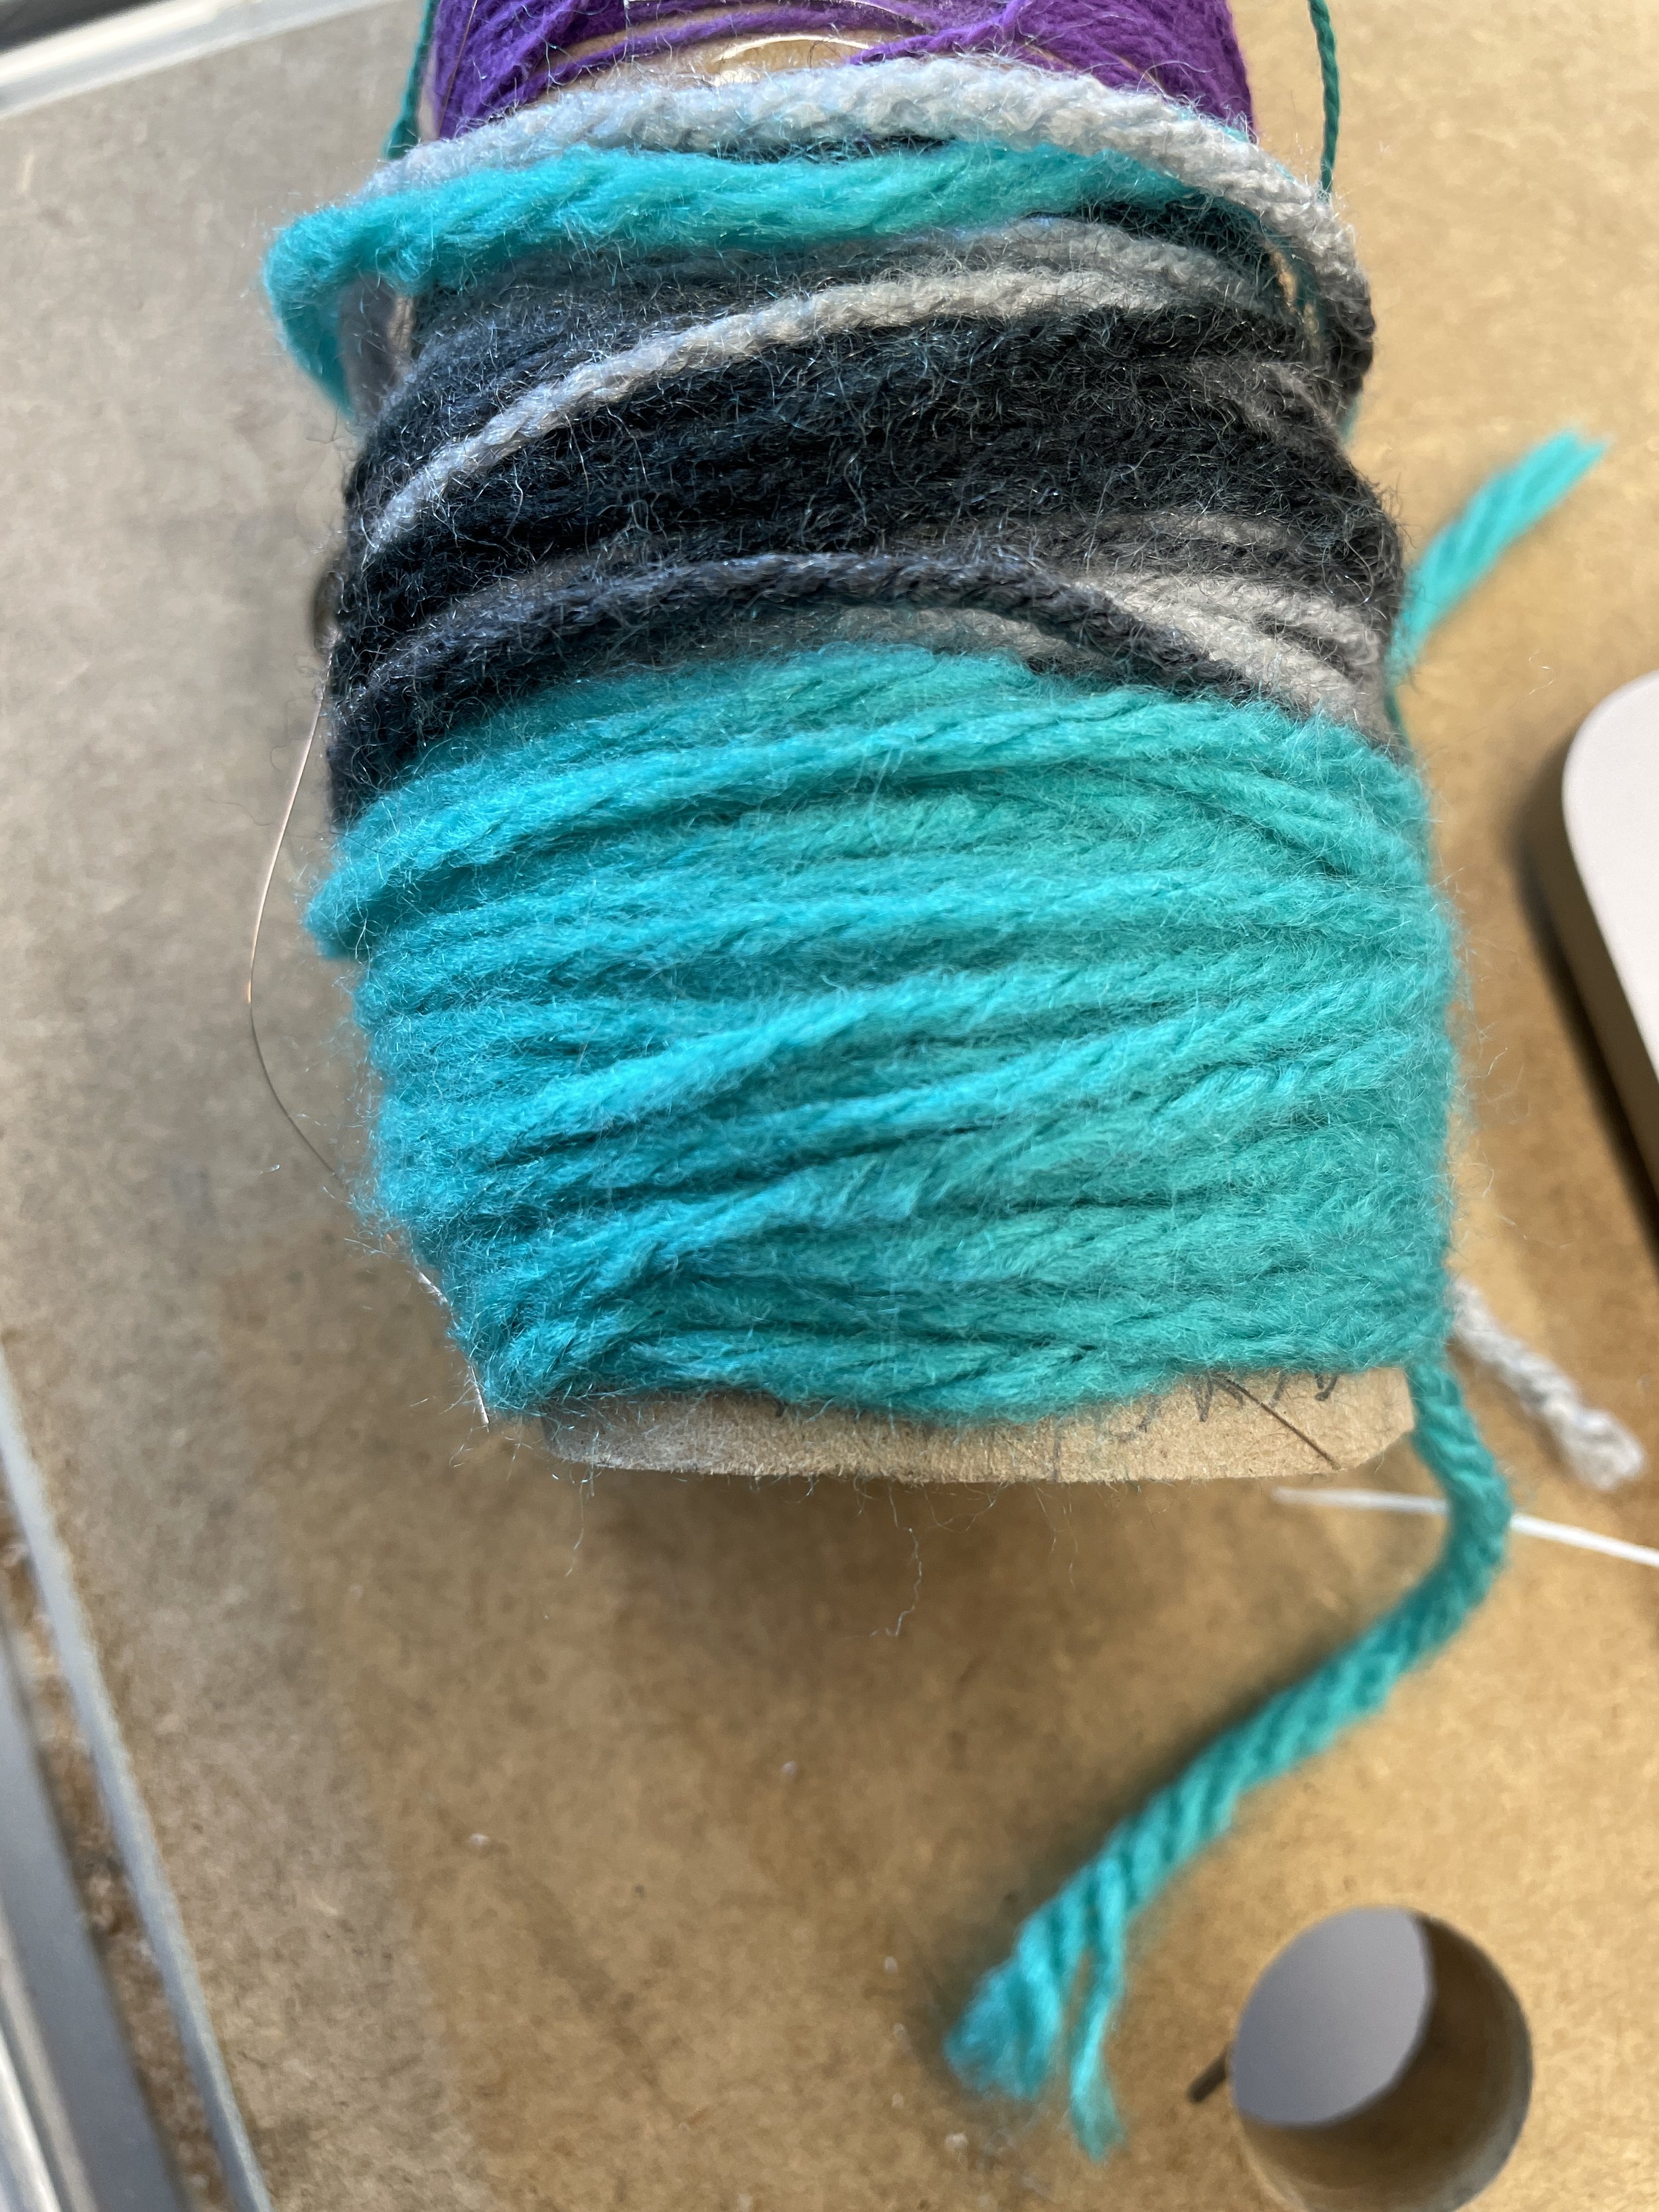
Cotton yarn (Recommended: 20 warp threads, 6.5 yards of thread)
Acrylic yarn (chunkier than cotton)
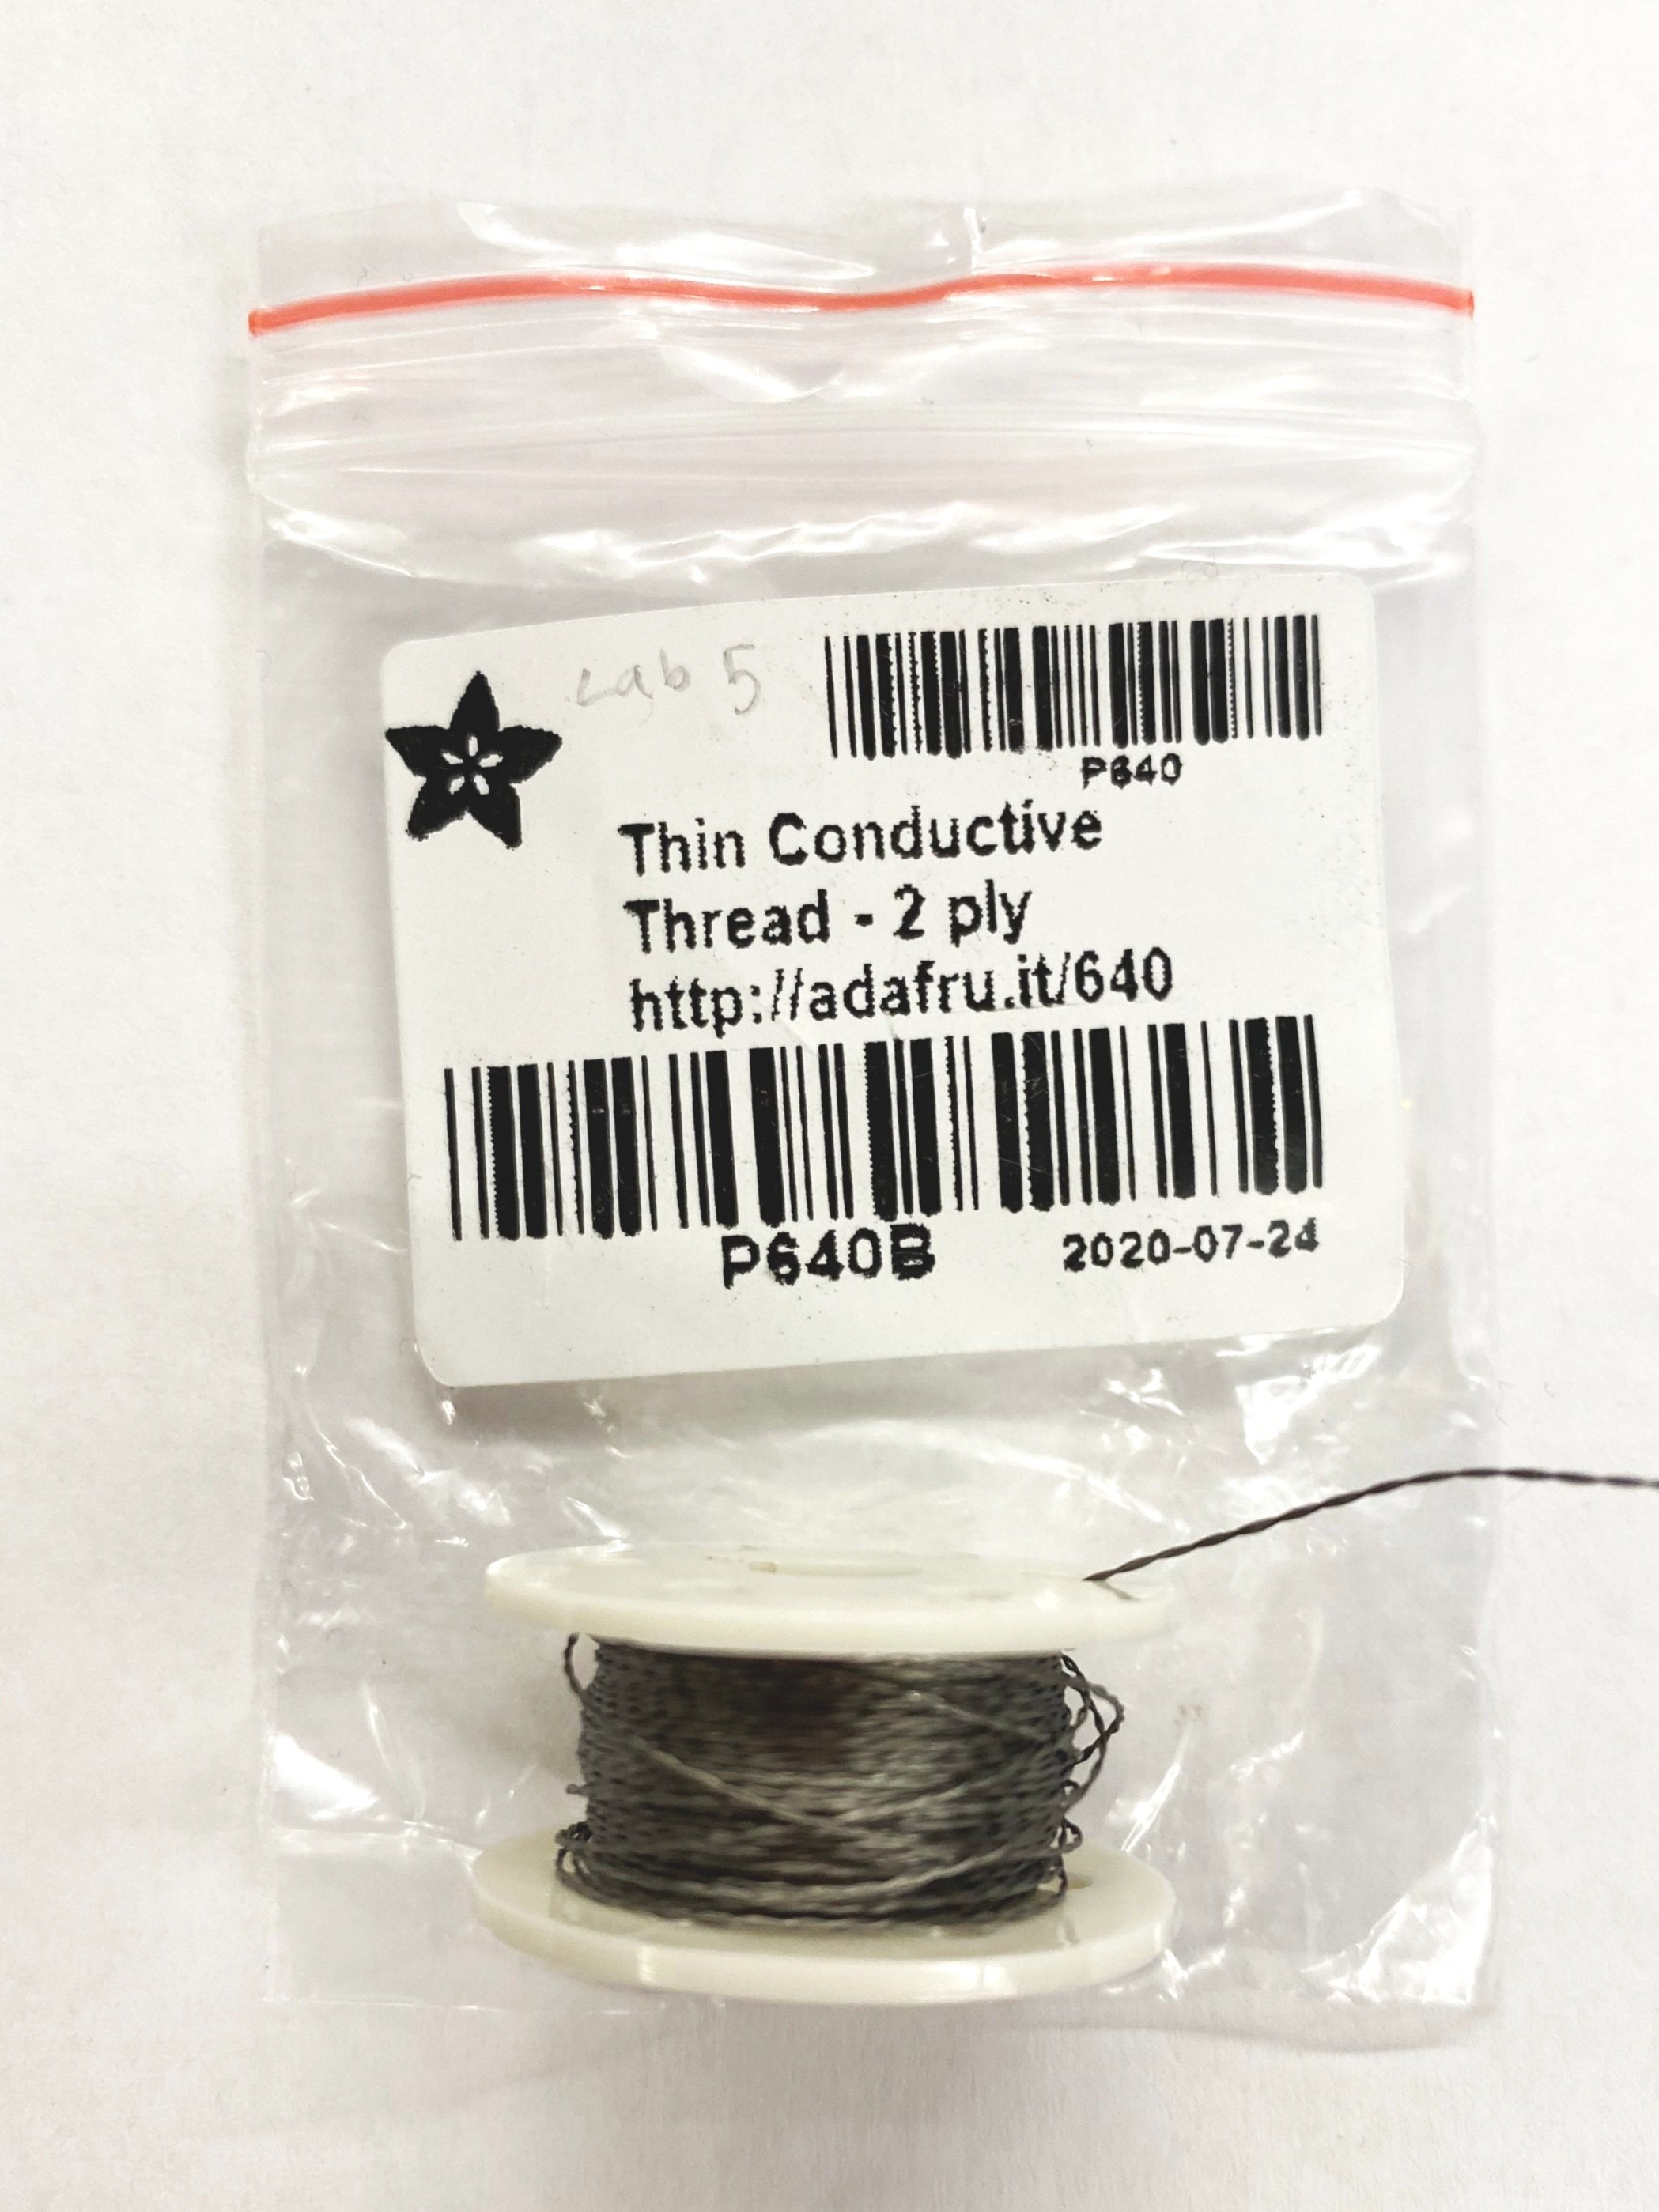
Conductive thread
Scissors
Comb
Multimeter (how to use)


Introduction to WEAVE
Woven fabric is formed by interlacing warp yarns and weft yarns, which run in perpendicular directions. The warp yarns are vertical, and held under tension on a loom, while weft yarns are horizontal and pass between warp yarns.
First, try setting up the loom using the chunky acrylic yarn we have provided (the thickest yarn on the spool). Follow the instructions below to get familiar with weaving a plain weave.
Set up for weft
Measure out 6.5 yards of thread (we’ve measured it for you).
Pull your yarn through the whole in your “tapestry needle”. Your kit does not come with a tapestry needle, but you can tape the yarn to anything long and thin (ex. A paintbrush or toothpick). Leave a 3-4 inch tail. This is what we will use to weave the yarn between the warp threads.
Plain Weave
Plain weave is considered the most basic weaving structure. In plain-woven fabric, each weft yarn goes over one warp yarn and under the next. This "over, under" sequence is repeated. Neighboring weft yarns pass through warp yarns in alternating sequences to secure the structure.
Goal:
Start by following the instructions below to weave your first plain weave. Use the thicker acrylic yarn for this practice weave. You have an extra fine 20 slot loom, but you will only be using every other slot for the warp with this chunky yarn, so that you have 10 warp threads.

Construction Steps
You will be constructing a basic plain weave with conductive thread to program using Arduino!
**Click to Enlarge Purl & Loop Instructions below

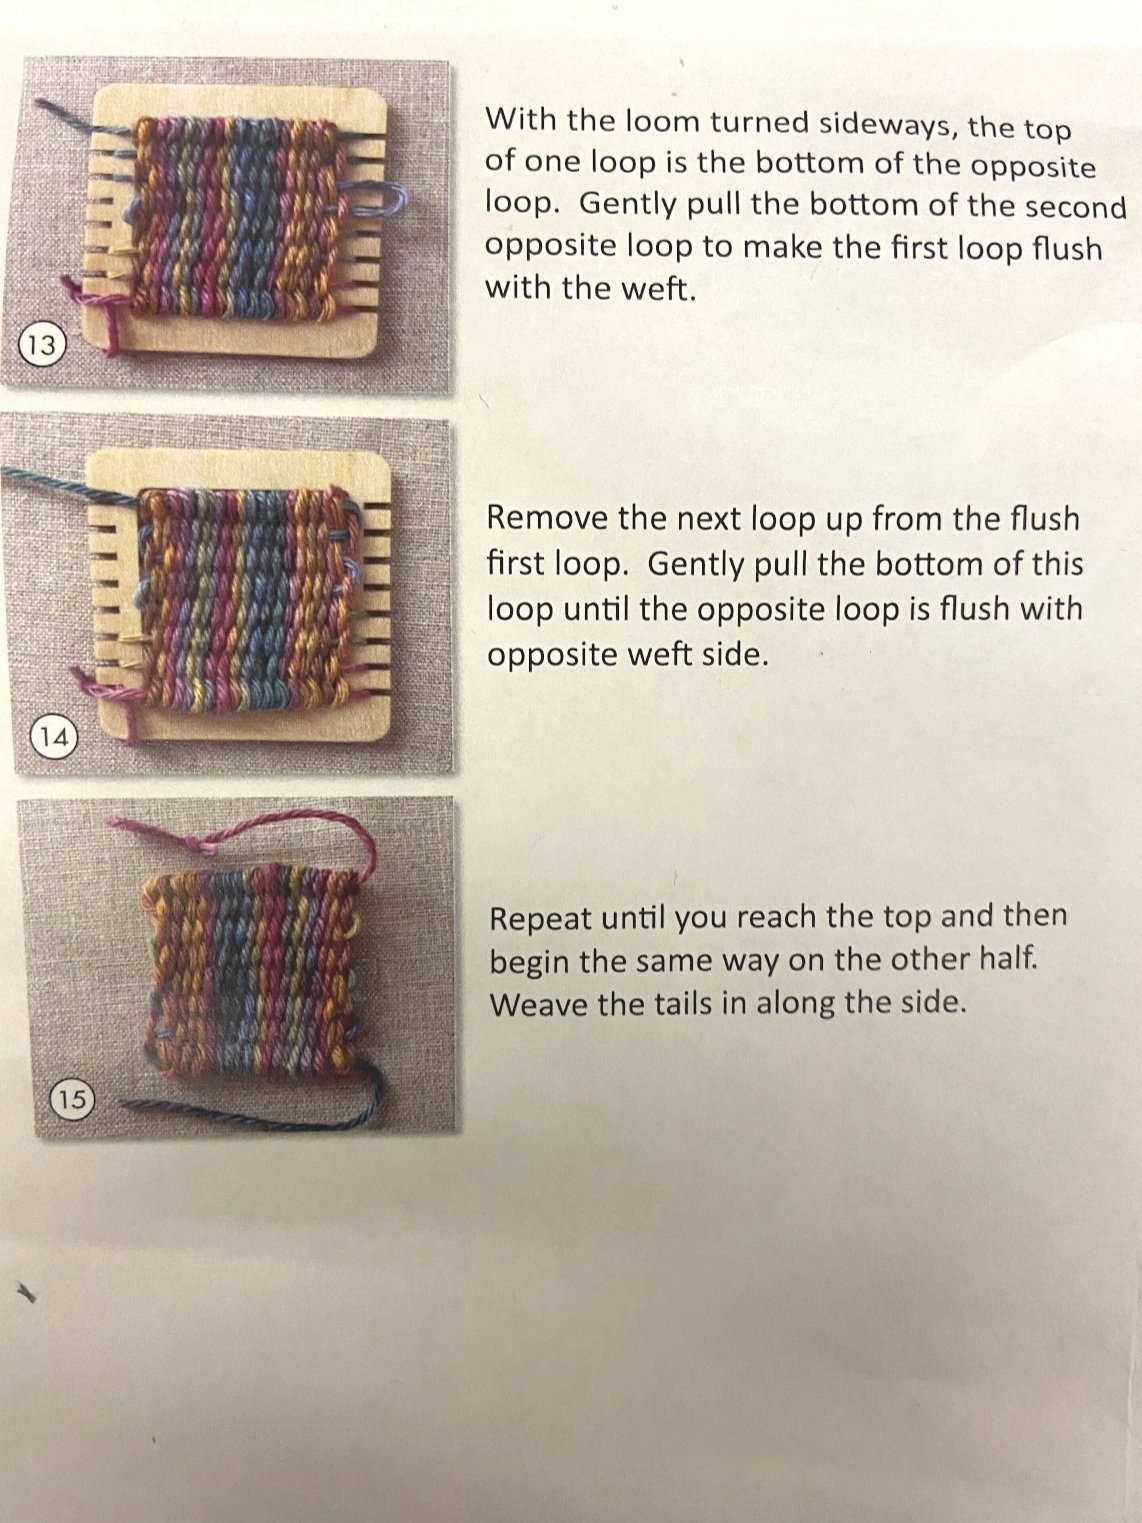
Fabrication & Weaving
Process Pictures:
1. Set up loom warp with thin yarn. The one used in this tutorial is 20 warp threads, 6.5 yards of thread.
2. Start with a plain weave and weave about a third of the way up.
Note: It may be easier to have tails of the threads on alternating sides of the weft yarn so it is easier to hook up to the TinyLily Mini Processor (tails for conductive threads should stay on the same side for easier programming)
3. Cut off the yarn. Cut ~1.5 yards of conductive thread. Weave this continuously until you have at least a 0.5cm section of conductive thread.
4. Continue to plain weave with your yarn, weaving a 0.5cm section.
5. Repeat steps 3 and 4, two more times so that you have 3 evenly spaced sections of conductive thread the center of the weave.
6. Continue to plain weave until the loom is filled.
7. Finish your weave and remove it from the loom using steps 10-15 from pictures provided in the Purl & Loop tutorial. Feel free to reference videos.


Functionality
Set Up TinyLily with Arduino
Download Arduino and use this link for TinyLilyProcessor with Arduino for more details .
Program Your TinyLily
1. Connect your TinyLily to the computer
2. Launch the Arduino IDE and navigate to the Tools tab. For the TinyLily Mini Processor, we are going to make the following selections:
Board: "Arduino Pro or Pro Mini"
Processor: "ATmega328p (3.3V, 8MHz)"
Port: "COM##" - this is the port connected to the TinyLily via the MicroUSB cable (for Mac find “dev/cu.usbserial XXX”)
3. Upload the Captouch code we have provided for this tutorial to the TinyLily:
4. Connect the weave to the LilyTiny:
Conductive threads SHOULD NOT touch, cross or intersect each other
Make sure that the fraying from the ends of the conductive thread do not interfere with the processor or other conductive threads
5. Attach each conductive thread to pins A0, 2, and 3 by tying them to the holes in the TinyLily.
6. Observe the changing values in the serial monitor when you touch the conductive areas of your weave!
Observe the values changing with every touch!!
(Optional) Other Weaving Patterns to Try
(Optional) Inserting different materials in weft and/or warp
What other materials can we insert in the weft?
Colored thread
Thermochromic thread
Reflection Questions
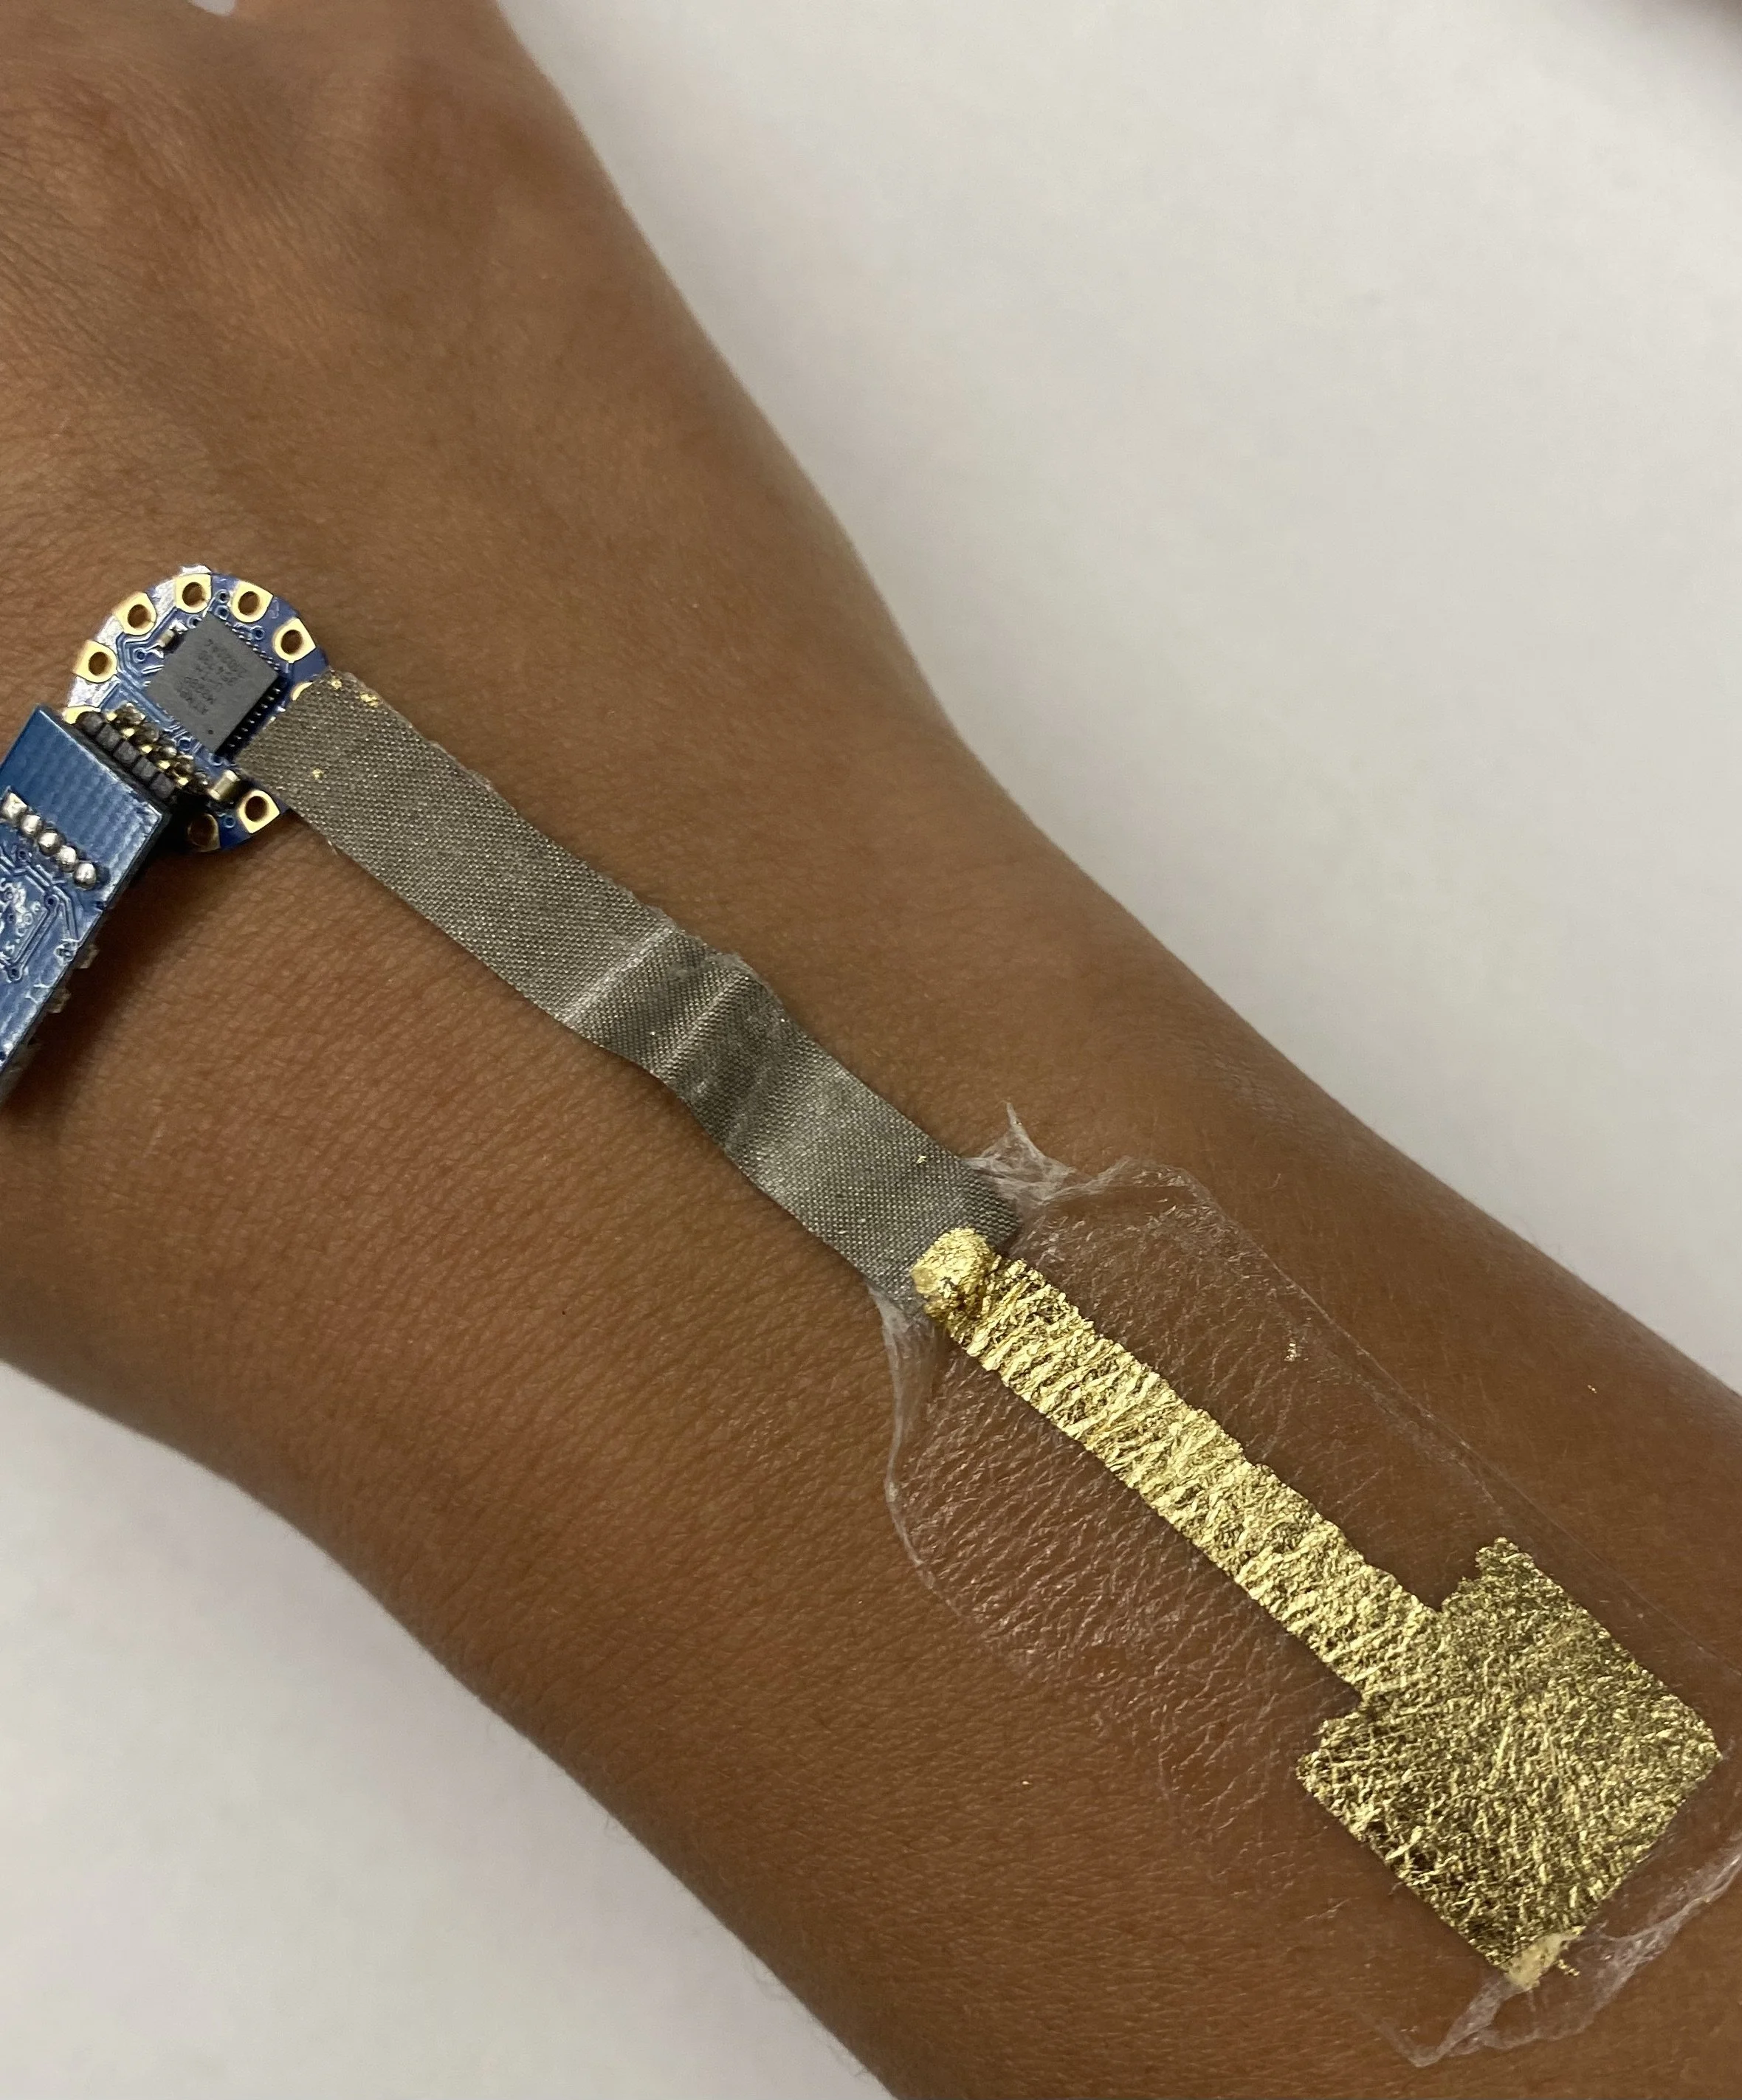
How would you compare the capacitive touch slider you created here with the DuoSkin capacitive touch electrode in Lab 3?
Which step did you find most challenging in this lab?
For your Lab 5 submission, construct a woven slider (5.2). Post a photo onto the Canvas discussion board, with a 100-word description on what you made, responses to the reflection questions, and any challenges you encountered on the way.
Note: if you are already an experienced electronics builder you are encouraged to expand the project to match your skillset.
FAQ (Frequently Asked Questions)
Q1. Between conductive thread and copper wire, which one would be more conductive and reliable?
Answer: Copper wire would be more conductive and often more reliable than conductive thread.
Q2. After weaving the conductive threads in the Tiny loom, in total 6 thread ends remain loose. Which ones get connected to which holes?
Answer: You have to connect three different conductive thread sections to three different pins of the TinyLily MCU. That means you can select one loose thread from each section and tie them to the assigned holes in the TinyLily. In our example, the TinyLily pins are A0, 2, and 3 respectively.
This is quite similar to Lab 3. In Lab 3, we made one capacitive sensing section with the gold metal and here we are making three capacitive sensing sections with three sections of woven conductive fabric.