TOOLS AND MATERIALS
Shieldex 235/36 dtex 4 ply +B Conductive Thread
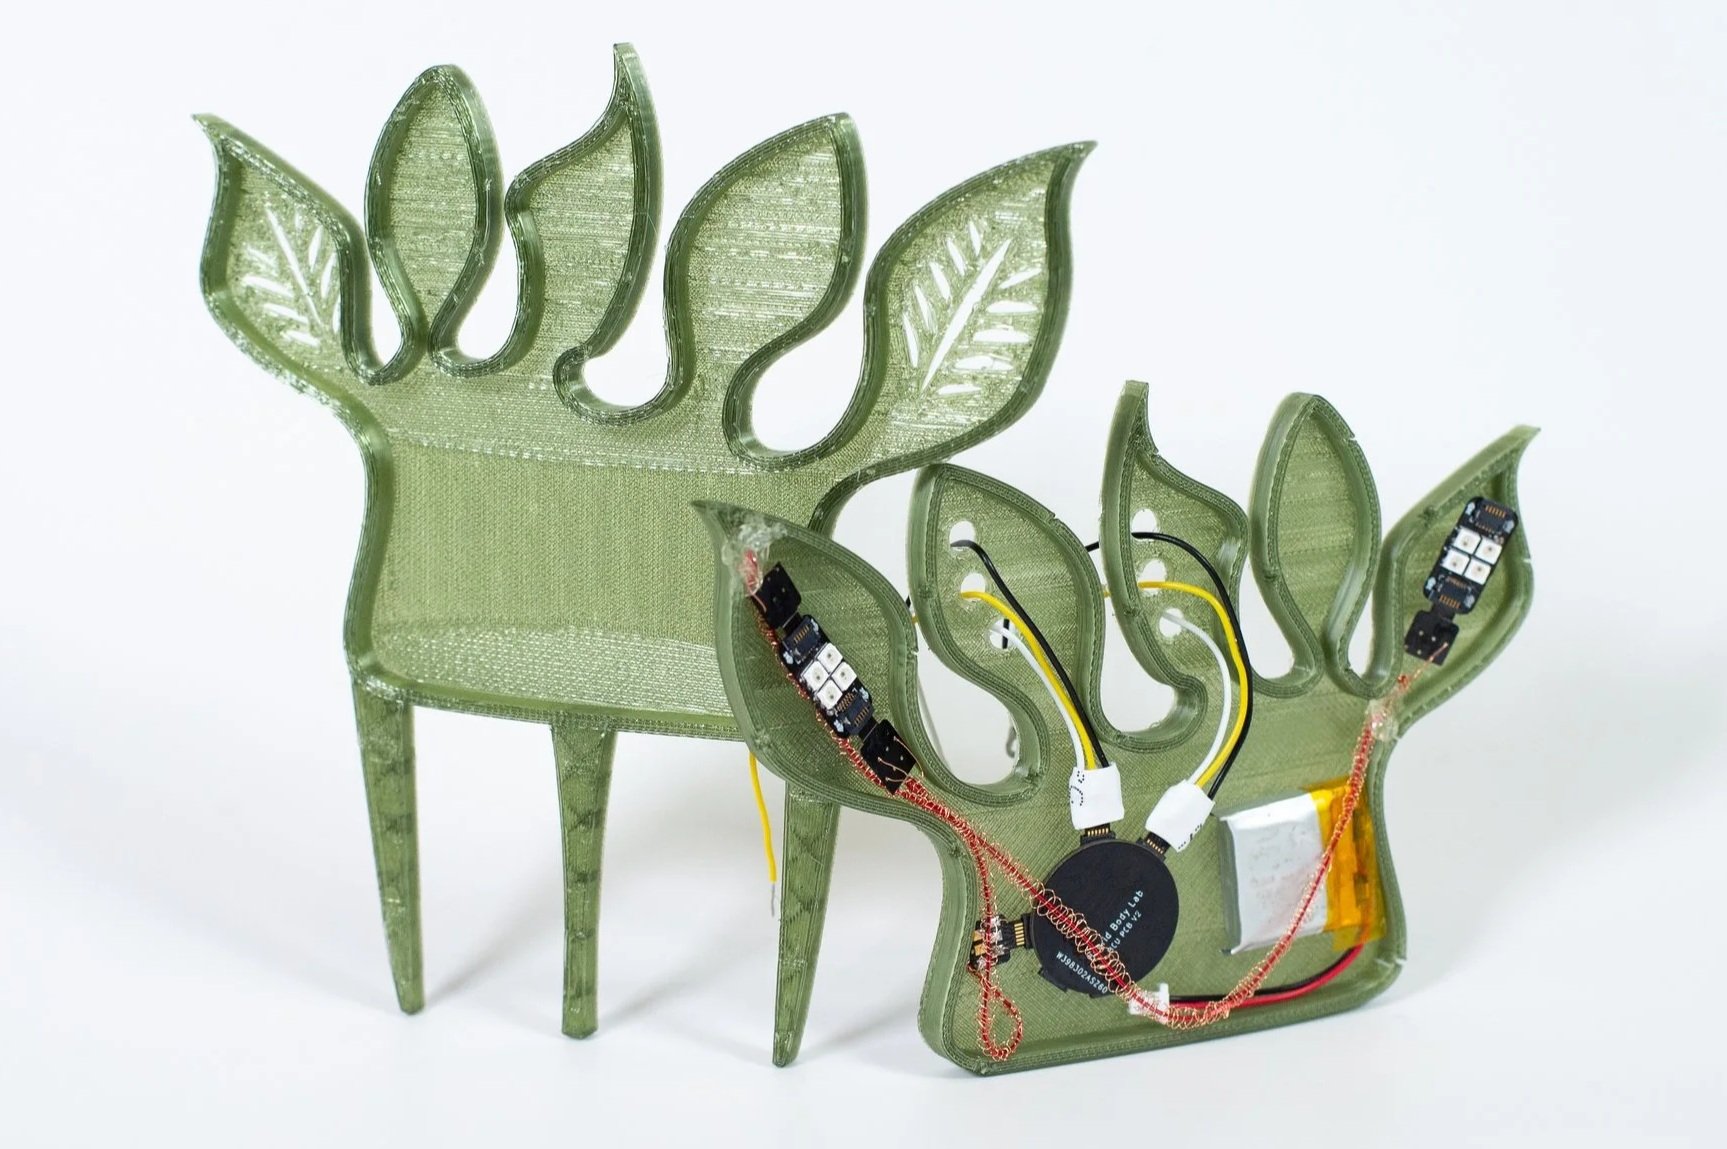
SkinLink Toolkit: MCU module, 2 NeoPixel RGB LED modules, connector modules
3D printed comb enclosure
3D printed anchor
Clear nail polish
CONSTRUCTION
Braid Conductive Threads
Add six strands of conductive threads to the anchor, coat the top 3cm of conductive thread with clear nail polish to insulate them.
Use the anchor to separate the conductive threads, seprate the hair into three strands and put one conductive thread into each of the strands
Braid two dutch braids, ensure the conductive threads are not shorting during the braiding process by using a multimeter to test continuity.
SkinLink Circuit Preparation
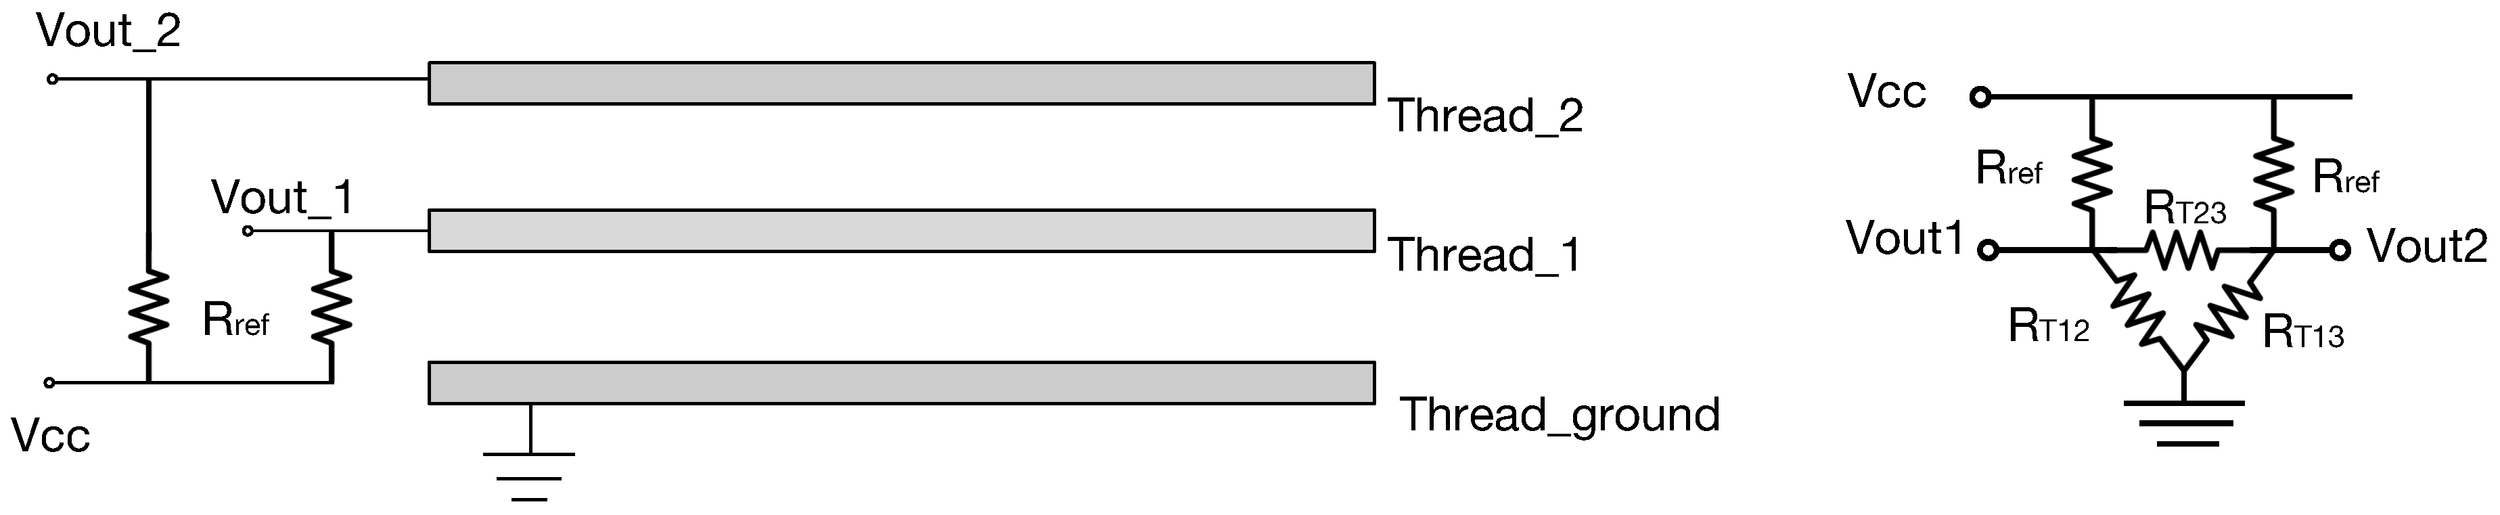
Solder 1MOhm resistor to the SkinLink connector modules based on the circuit diagram from https://www.mdpi.com/1424-8220/18/11/3775
Assemble SkinLink modules as shown in the image below
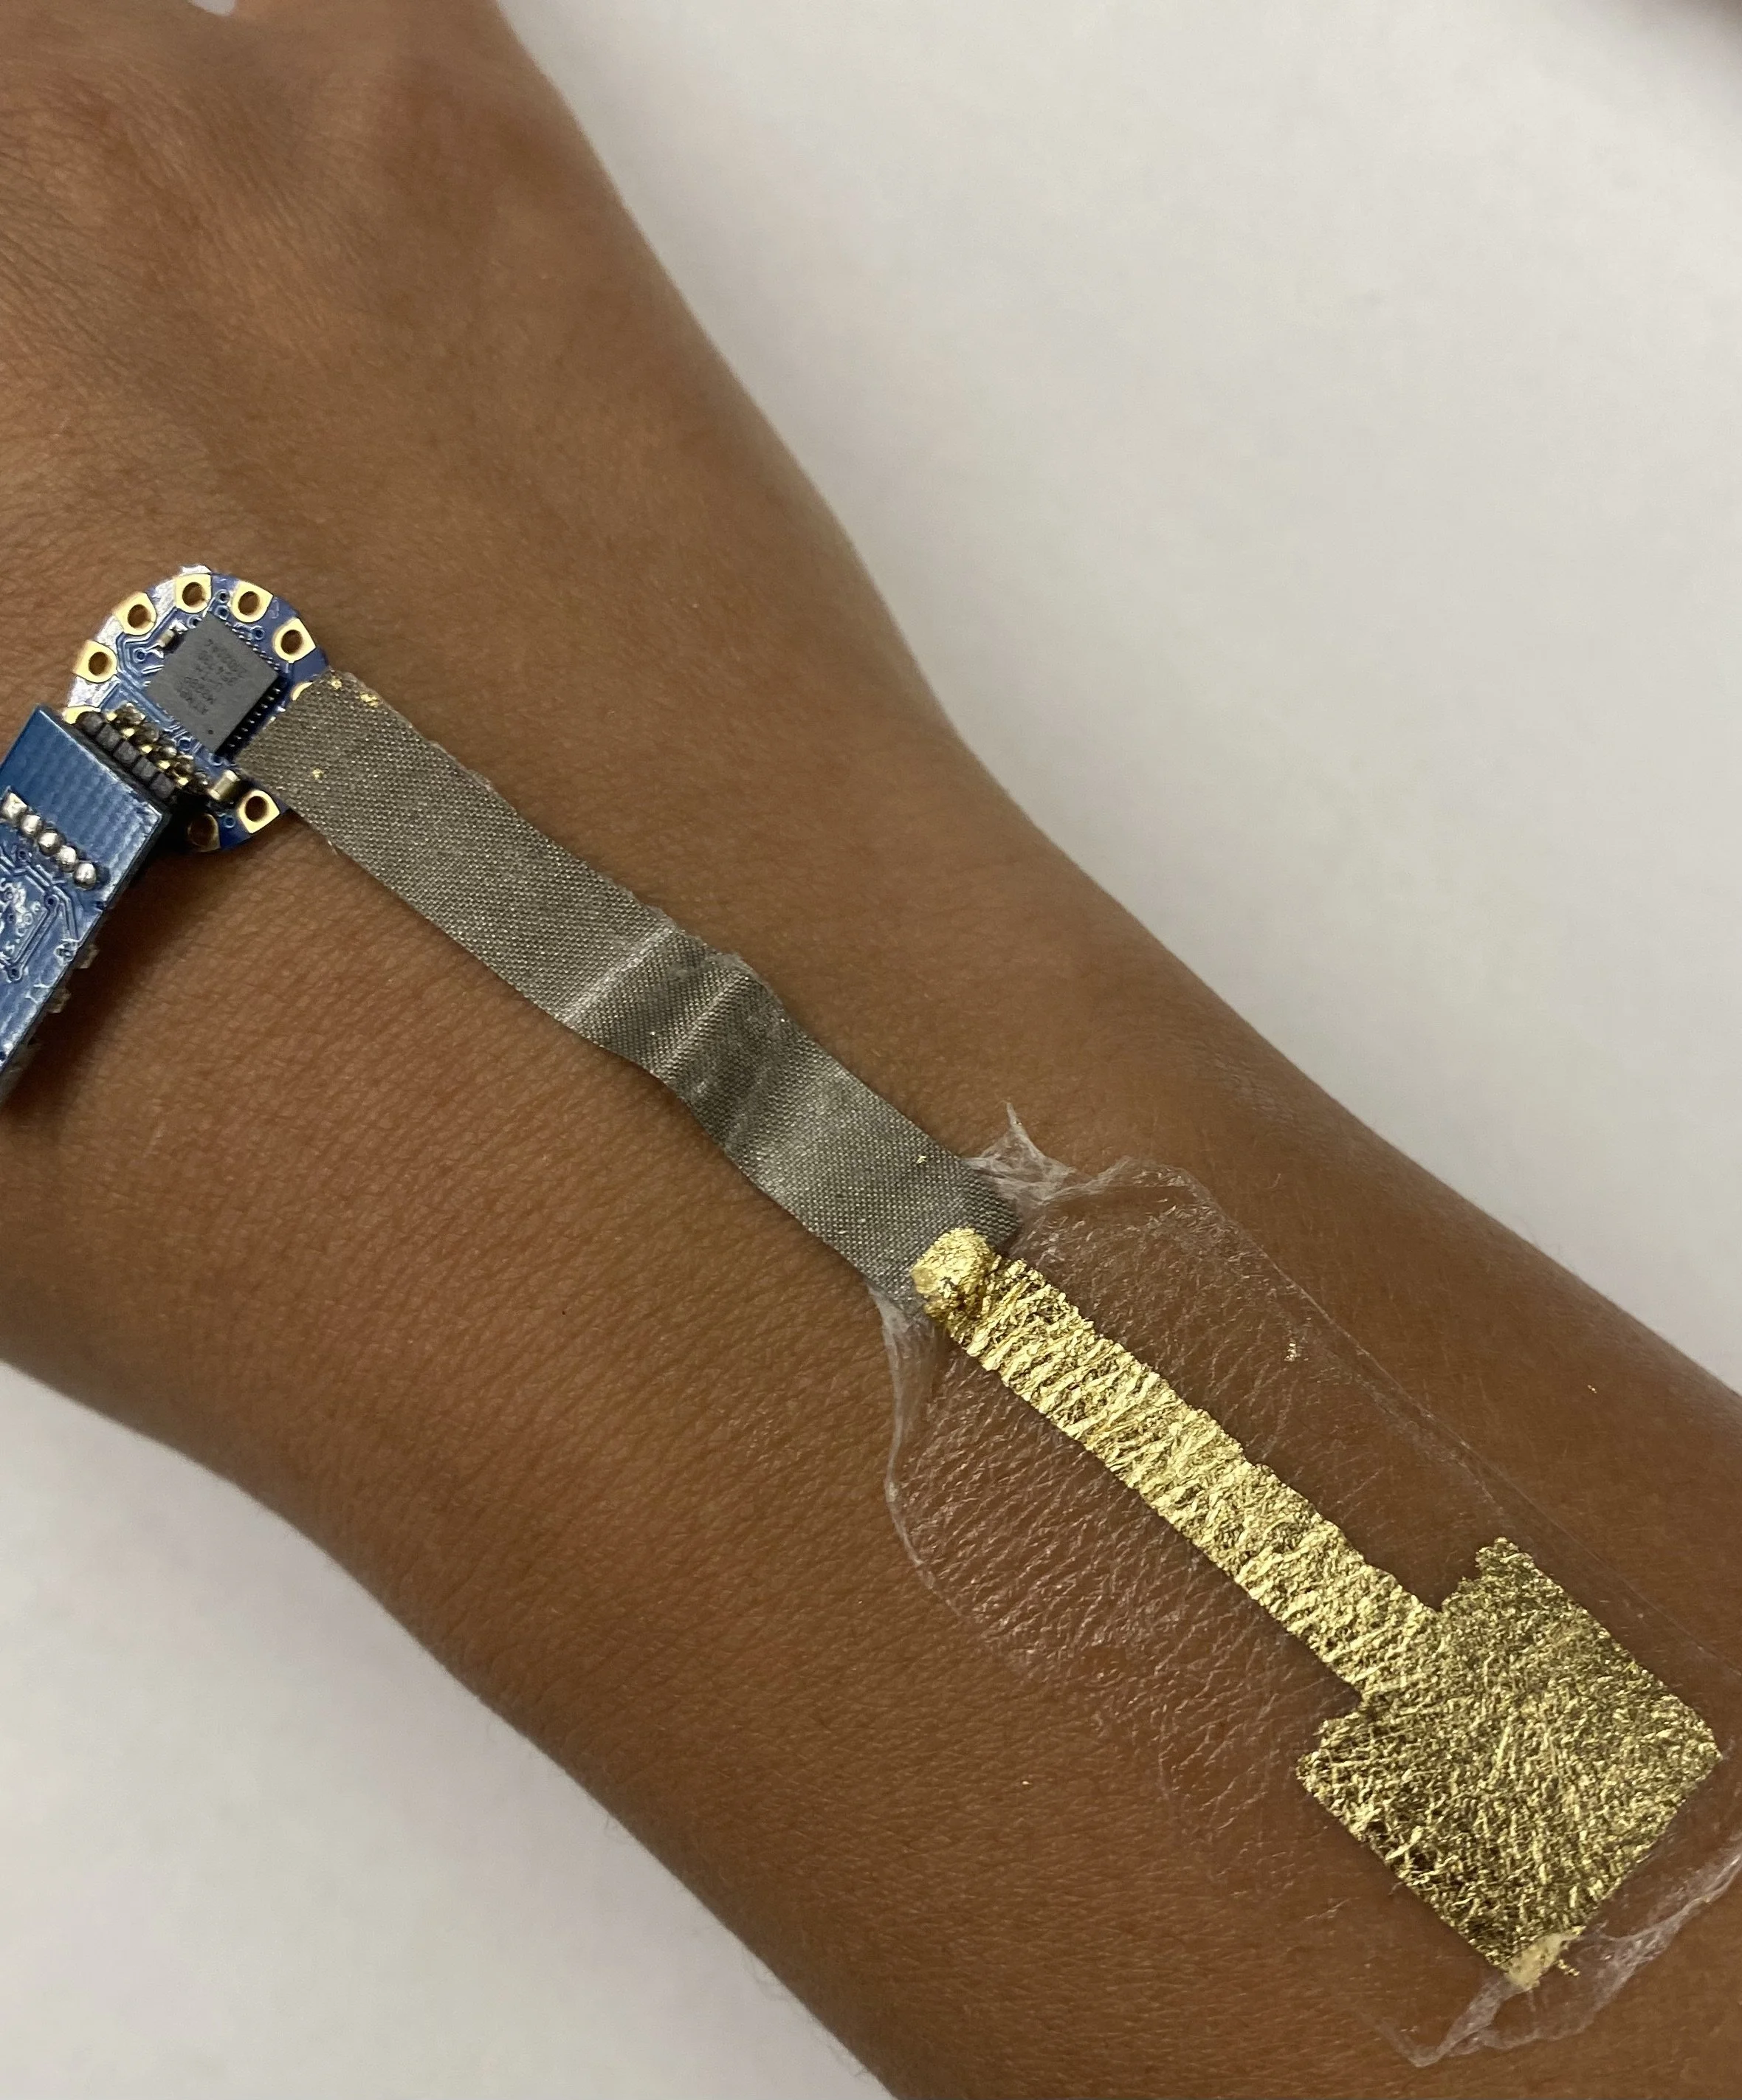
Hardware-Threads Connection
Connecting each end of the conductive thread to the SkinLink hardware through crimps.
Insert the comb to the bottom of the braids.